Key Takeaways
- The Arduino Nano 33 IoT costs $24 and handles basic IoT tasks with built-in Wi-Fi
- A smart irrigation system lets you water plants remotely via UDP packets and a mobile app
- DIY LED coasters use 32 LEDs and cost less than buying commercial versions
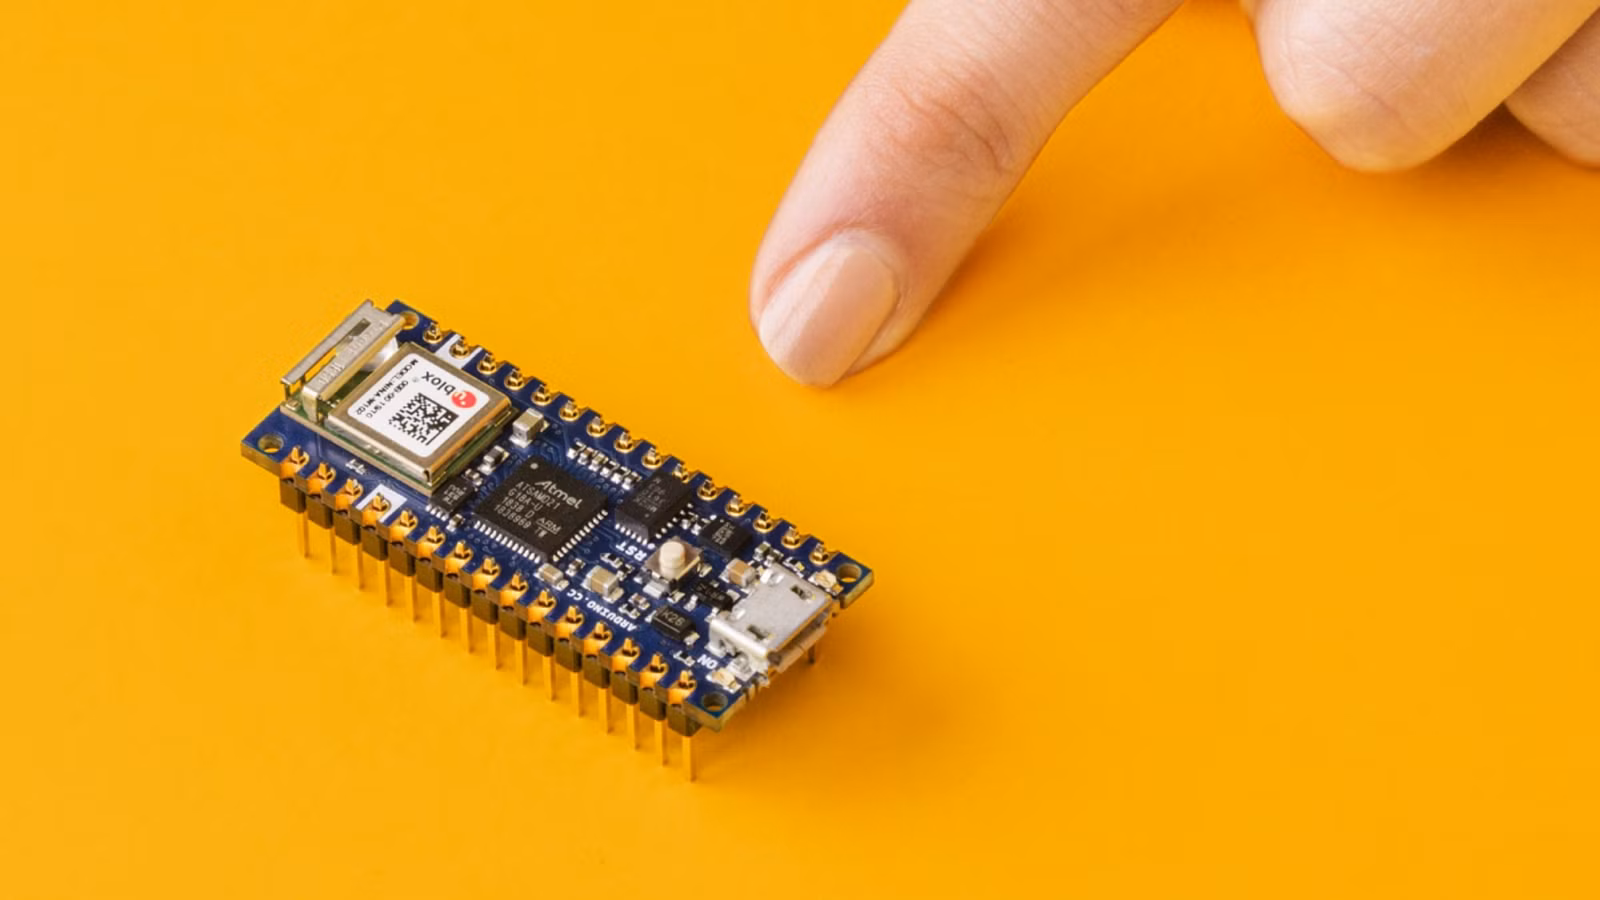
Smart home gadgets don't have to come from Amazon. With a $24 Arduino Nano 33 IoT board, you can build your own. The board handles Wi-Fi connectivity out of the box, making it a solid starting point for home automation projects that would otherwise cost more as finished products.
Arduino calls the Nano 33 IoT a "one-stop-solution" for basic IoT applications. It's small, cheap, and programmable. If you're comfortable with a soldering iron and basic code, you can turn it into a plant watering system, a glowing coaster, or a relay controller for other devices.
Here are three projects worth trying.
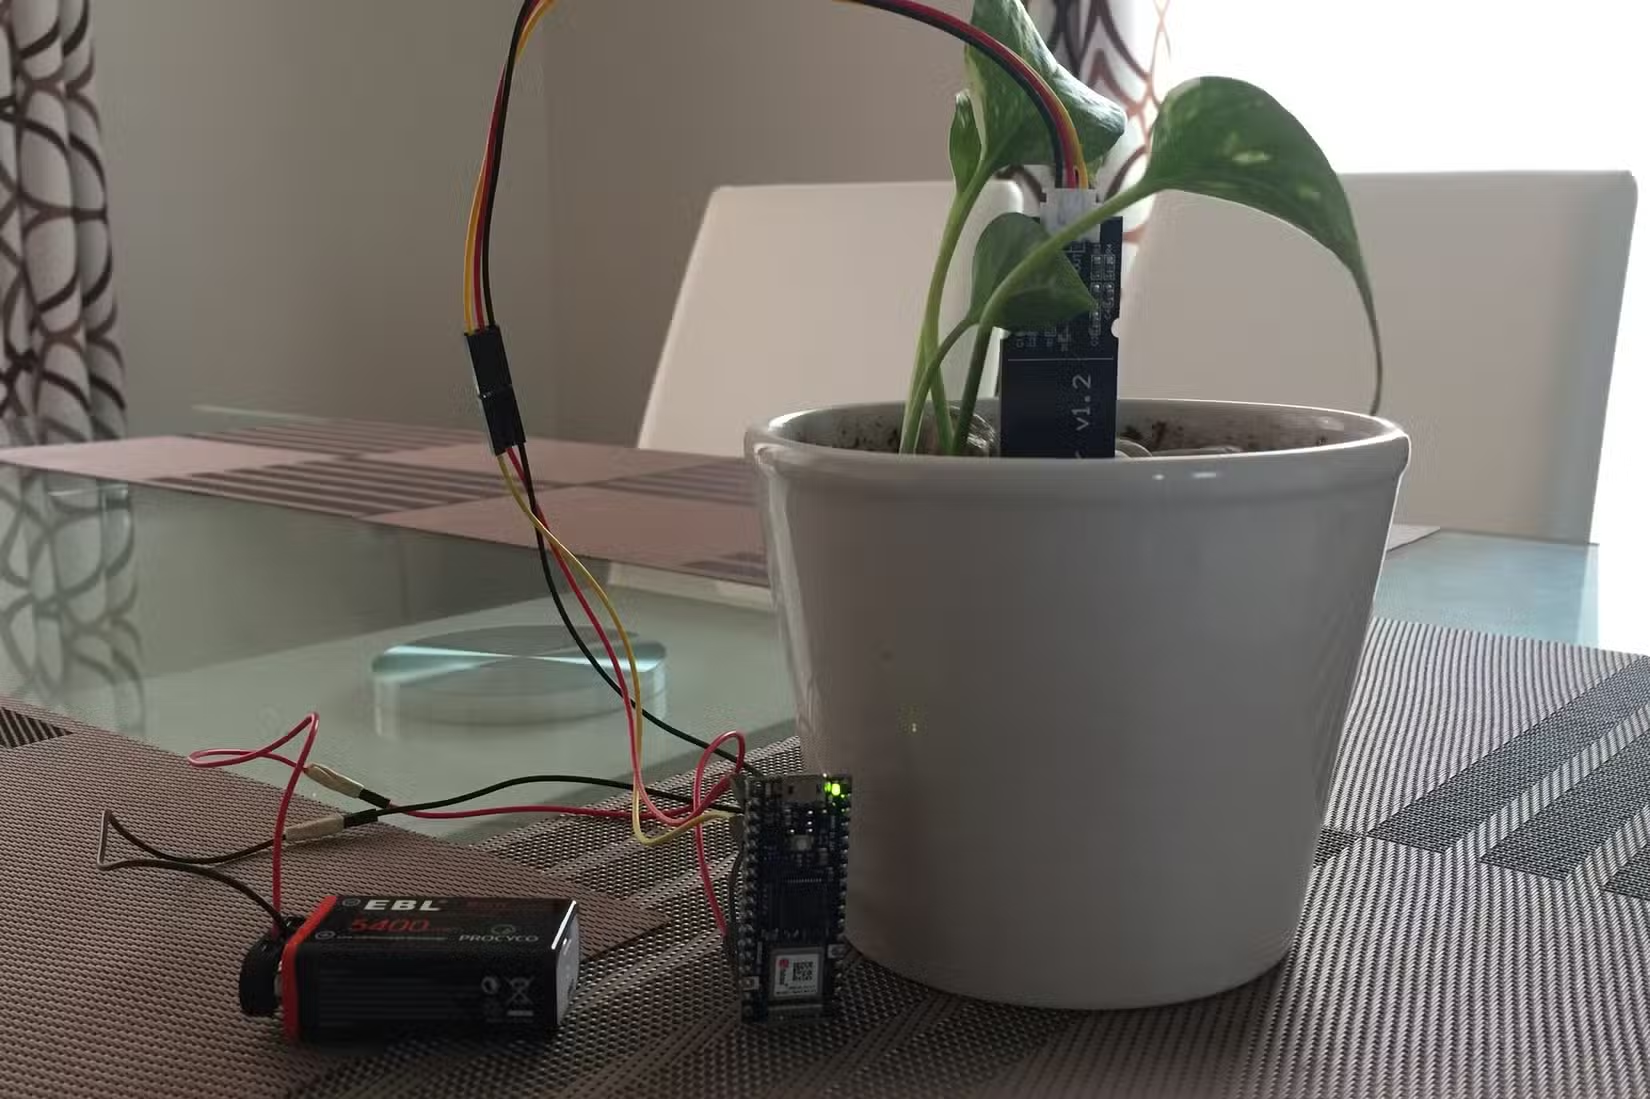
1. Automated Plant Irrigation System
If you travel often or just forget to water your plants, an IoT-enabled irrigation system solves the problem. The setup uses the Arduino Nano 33 IoT to control water flow based on commands you send from your phone. As long as you have Wi-Fi, you can trigger watering from anywhere.
A detailed build guide from PCBWay walks through the process. The core involves designing a circuit and PCB using Altium Designer. The board has separate power inputs for the Arduino and relay-controlled devices like pumps or valves. This keeps the low-power microcontroller isolated from higher-draw components.
The PCB layout mounts the Arduino Nano 33 IoT and a solid-state relay without messy wiring. Once assembled and soldered, you program the system with your Wi-Fi credentials and configure it to receive UDP packets for controlling the relays.
For remote operation, the guide recommends the RootSaid Wi-Fi Command Center Android app. You send commands from your phone, the Arduino receives them over Wi-Fi, and the relay switches on the water pump. Simple, effective, and cheaper than commercial smart irrigation controllers.
2. LED Smart Coaster
Smart coasters with LED lights sell for around $20 on Amazon. They're popular gifts for people who work at desks. But if you want a DIY project that teaches PCB design, you can build your own for roughly the same cost.
Mastoras Inc published a build guide on Instructables that covers the full process. The design centers on a circular PCB built around the Arduino Nano 33 IoT. You plan the placement of 32 LEDs in four different colors, then create the schematic and PCB layout.
After designing the board, you get it fabricated through a PCB service. The assembly involves soldering the LEDs and Arduino in place. The result is a coaster that lights up, responds to inputs, and looks better than most commercial options because you designed it yourself.
The project teaches practical skills: PCB design, component placement, soldering, and basic Arduino programming. The finished coaster makes a solid desk accessory or a custom gift.
Why the Nano 33 IoT Works for These Projects
The Arduino Nano 33 IoT stands out from cheaper Arduino boards because it has Wi-Fi built in. You don't need to buy and wire up a separate ESP module. The board handles network connectivity natively, which simplifies projects where remote control matters.
At $24, it costs more than a basic Arduino Nano. But you save that difference by skipping the extra Wi-Fi hardware and the headaches of integrating it. For IoT projects specifically, the Nano 33 IoT is the practical choice.
The board is also small enough to fit in tight enclosures. The coaster project works because the Nano 33 IoT doesn't take up much space on the circular PCB. The irrigation controller can mount inside a weatherproof box without requiring a large housing.
Getting Started
If you're new to Arduino, start with the irrigation project. It teaches relay control, Wi-Fi communication, and remote triggering without requiring complex PCB design. You can prototype on a breadboard before committing to a custom PCB.
The coaster project suits intermediate builders who want to learn PCB design. Expect to spend time in Altium Designer or a free alternative like KiCad. The learning curve is steeper, but the result is more polished.
Both projects cost less than their commercial equivalents. More importantly, they give you full control over the hardware and software. You can modify, expand, or repair your devices without waiting for manufacturer support.
Logicity's Take
For readers interested in open hardware and DIY tech
Frequently Asked Questions
What is the Arduino Nano 33 IoT?
It's a small microcontroller board with built-in Wi-Fi that costs $24. Arduino designed it for IoT projects where devices need to connect to the internet.
How hard is it to build an Arduino irrigation system?
Moderate difficulty. You need basic soldering skills and comfort with Arduino programming. The PCBWay guide provides detailed instructions. Expect a weekend project for first-timers.
Can I control Arduino projects from my phone?
Yes. The Nano 33 IoT connects to Wi-Fi, so you can use apps like RootSaid Wi-Fi Command Center to send commands from your phone to the Arduino.
Is it cheaper to build smart home gadgets or buy them?
Building often costs less, especially for simple devices. A DIY smart coaster costs roughly the same as buying one, but you learn PCB design in the process.
What tools do I need for Arduino projects?
A soldering iron, basic hand tools, a computer for programming, and PCB design software like Altium Designer or KiCad for custom board projects.
Need Help Implementing This?
Source: How-To Geek
Huma Shazia
Senior AI & Tech Writer
Produced with AI assistance and reviewed by the Logicity editorial team. Learn more in our Editorial Policy.