Key Takeaways
- ESP32 boards cost $8-15 and enable wireless control for DIY smart home devices
- Projects include a word clock, aircraft radar, and mmWave presence sensor with 3D-printed enclosures
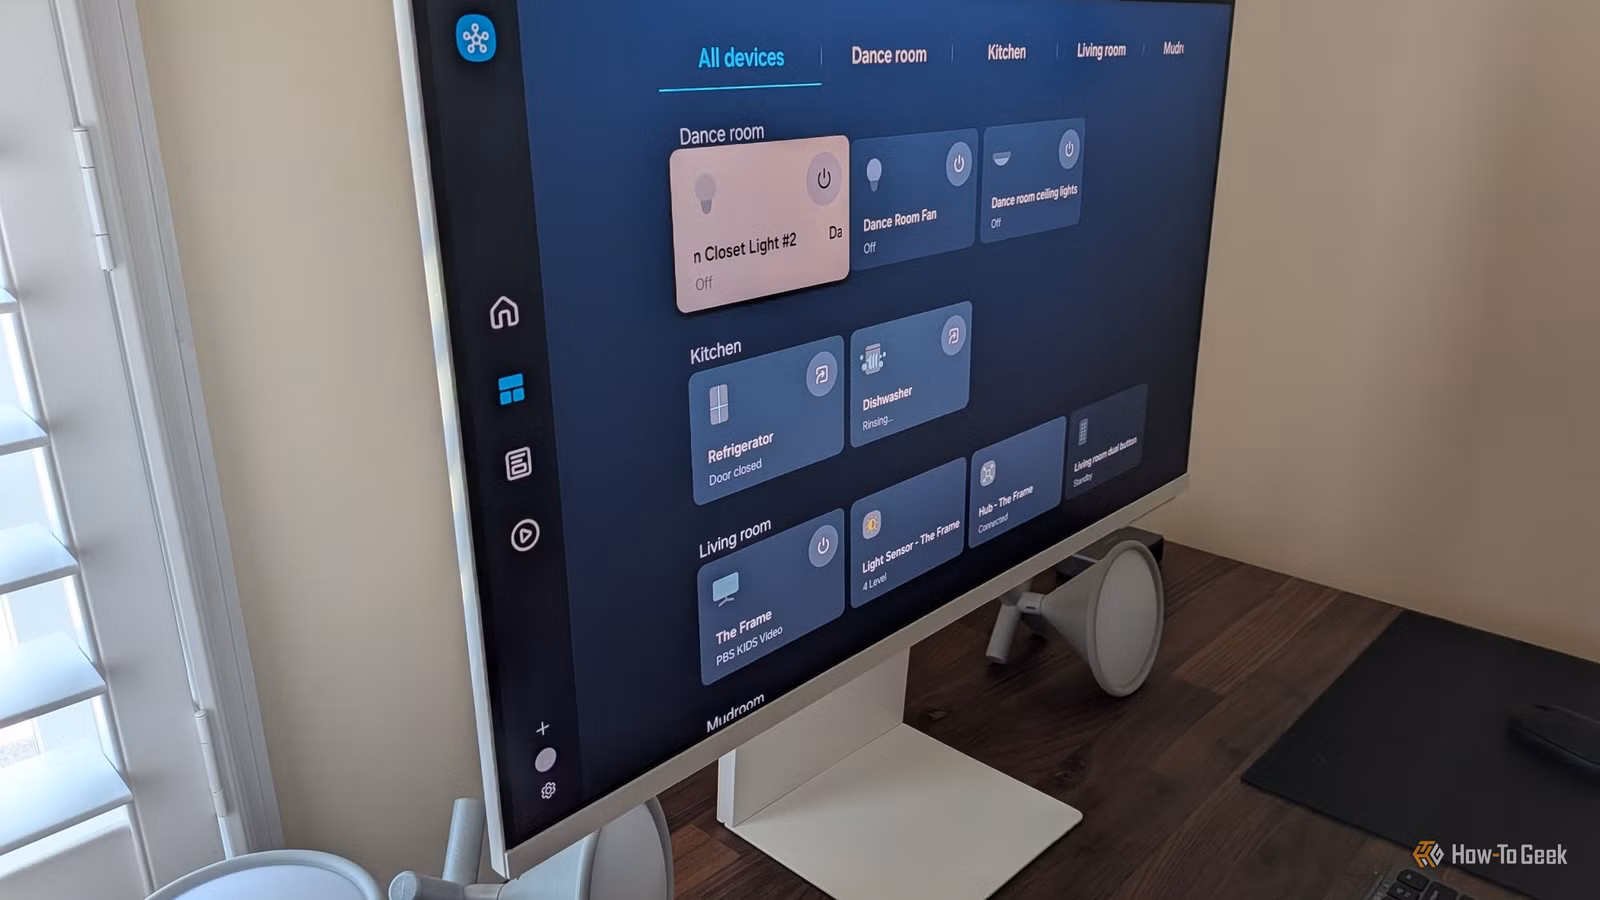
- The Seeed Studio XIAO ESP32-C6 supports Matter, Zigbee, and Thread for smart home integration
Five ESP32-powered builds hit MakerWorld this week, each combining a sub-$15 microcontroller with 3D-printed parts you can produce on any FDM printer. The projects range from a word clock that spells out the time to an aircraft radar with a round display. All use off-the-shelf components and come with printable STL files.
The ESP32 has become the default brain for maker projects. Espressif has shipped over 500 million of these chips, and the reasons are obvious: built-in Wi-Fi and Bluetooth, deep sleep modes that sip microamps, and a price that makes mistakes cheap. Pair that with a 3D printer and you can build enclosures that look like commercial products, not bare circuit boards taped to your wall.
Which ESP32 boards work best for these projects?
Two boards appear repeatedly across these builds. The Seeed Studio XIAO ESP32-C3 runs $5 direct or $10 on Amazon. It handles Wi-Fi and Bluetooth with a super deep sleep mode for battery-powered applications. The newer XIAO ESP32-C6 adds Zigbee, Thread, and Matter support for $5-12, making it the better choice if you plan to integrate with Home Assistant or Apple HomeKit.
Both boards are tiny, roughly the size of a postage stamp. That compact form factor explains why they fit inside enclosures that would never accommodate a full-size Arduino or Raspberry Pi.
Word clock that spells out the time
A word clock displays time as a sentence. Instead of showing 10:05, it lights up the words "it is five minutes past ten." Commercial versions sell for $100 or more. This one costs the price of two meters of addressable LEDs (74 LEDs per meter), an ESP32, some screws, and filament.
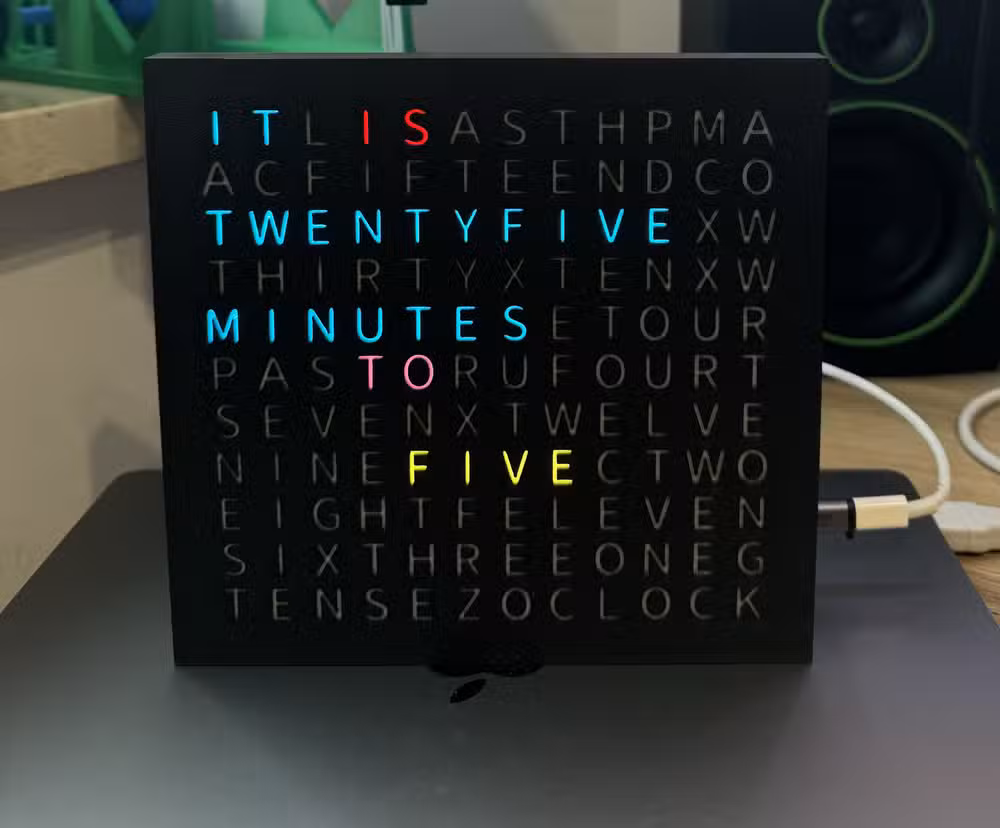
The build uses a 3D-printed word board with cutouts for each letter. LEDs sit behind the board and illuminate specific segments based on the current time. The project's GitHub page includes step-by-step instructions and the code to sync time over Wi-Fi. A Raspberry Pi Zero W works as an alternative to the ESP32 if you have one gathering dust.
mmWave presence sensor with a custom enclosure
Infrared motion sensors detect movement. mmWave sensors detect presence, even if you're sitting still watching TV. The difference matters for smart home automations. An IR sensor will turn off your lights after 10 minutes of inactivity; an mmWave sensor keeps them on because it can detect your breathing.
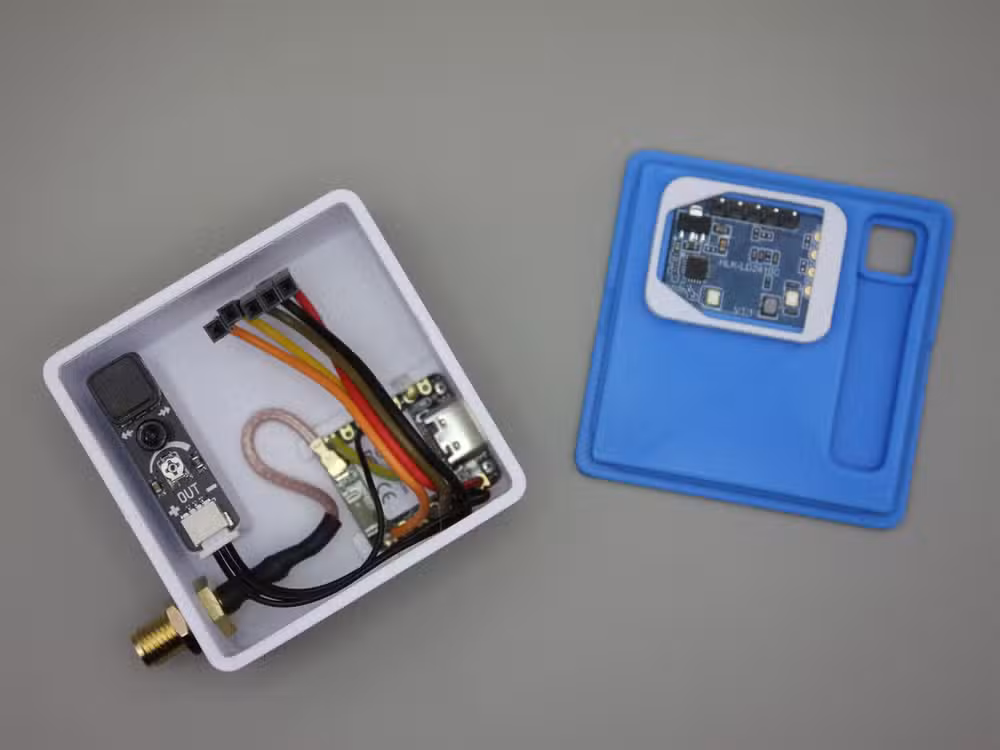
This enclosure fits a Seeed Studio XIAO ESP32-C6 connected to an LD2410C mmWave sensor. There's room for an optional passive infrared sensor too, giving you both detection methods in one unit. The real advantage is aesthetics. Most commercial mmWave sensors come in white plastic that clashes with everything. Print your own and match it to your walls.
Aircraft radar for plane spotters
Live near an airport? Tired of opening FlightRadar24 every time you hear a jet overhead? This build puts a 1.28-inch round display on your desk that shows aircraft locations, callsigns, and altitude in real time. The circular screen looks like an actual radar scope.
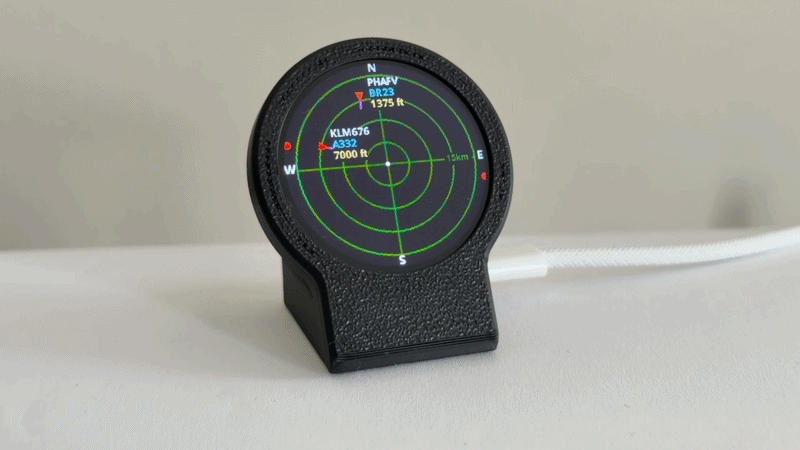
The parts list is short: an ESP32-C3, a GC9A01 round SPI display, and a USB-C cable for power. The enclosure prints in two parts. Total cost lands under $20 if you shop around for the display.
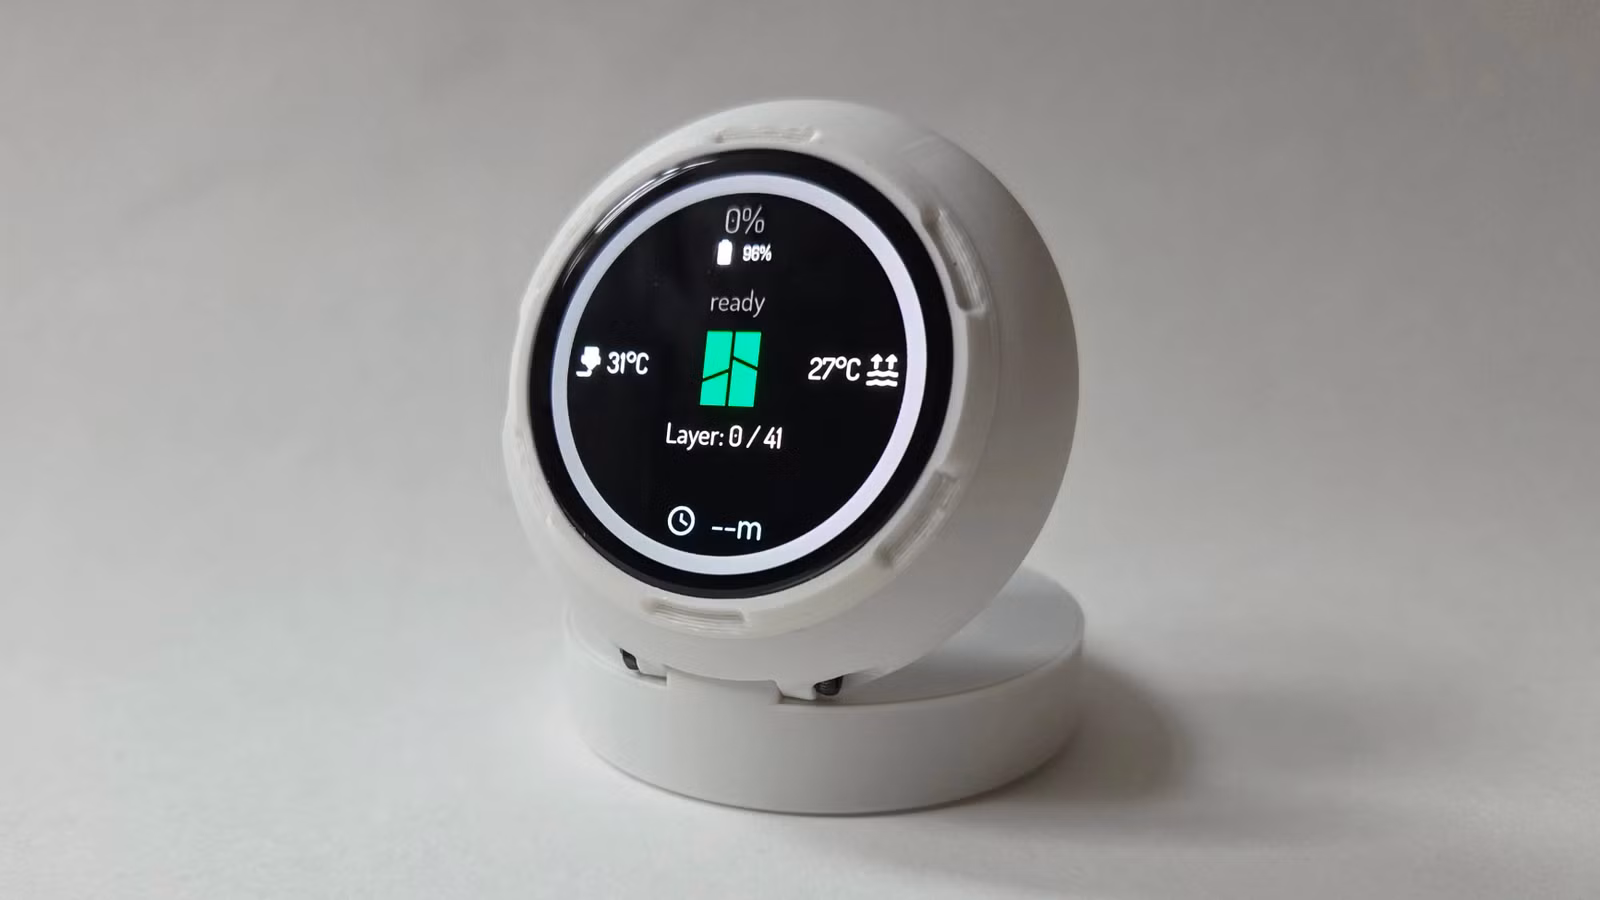
3D printer monitor with a spherical display
The PrintSphere project uses the same round display to monitor your 3D printer remotely. It connects to OctoPrint or Klipper and shows print progress, temperatures, and time remaining. The 3D-printed enclosure gives it a futuristic look that fits on a desk without screaming "hobbyist electronics."
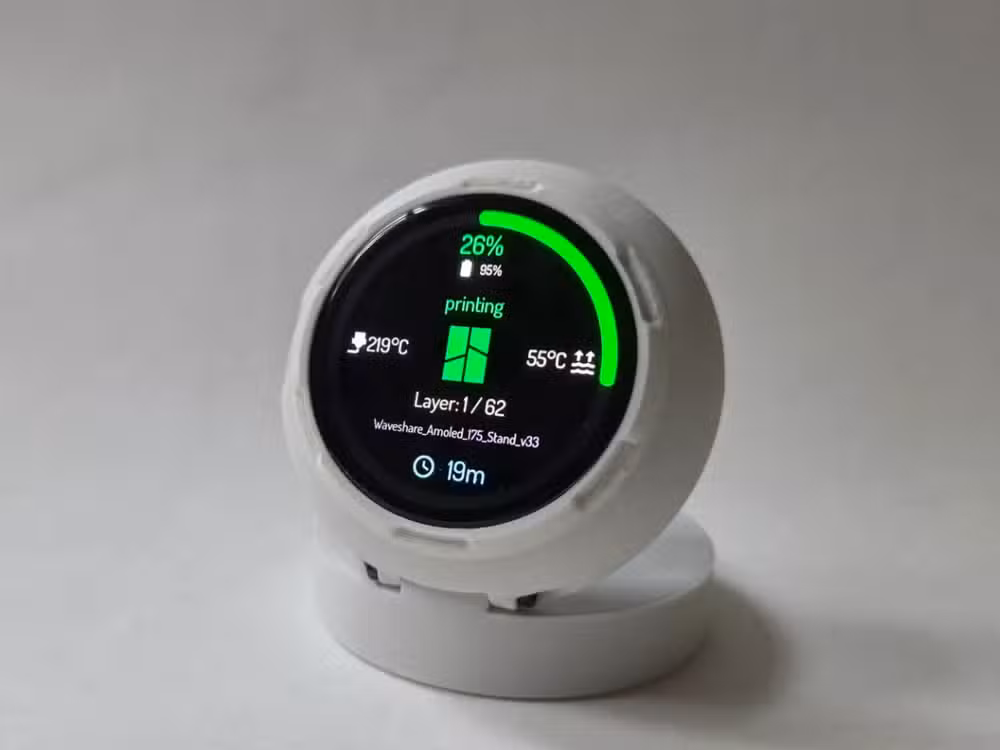
If you run a print farm or just hate walking downstairs to check on a print, this fills a real need. The ESP32 pulls data over your local network, so there's no cloud dependency or subscription.
What you need to get started
Every project requires a 3D printer capable of printing the enclosure. Most designs fit on a standard 220mm bed. A Bambu Lab P2S or similar enclosed printer handles the job, though any reliable FDM machine works. The P2S runs $549 and prints at 600mm/s if you're looking to upgrade.
Beyond the printer, you'll need basic soldering skills for most builds. The ESP32 boards come with header pins that require soldering to connect sensors and displays. A $20 soldering iron from Amazon handles the job fine.
Another quick weekend project guide for productive hobbyists
Logicity's Take
These projects sit at the intersection of two maturing hobbies. 3D printing has reached the point where a $200 machine produces usable parts, and ESP32 boards have enough community support that you're rarely starting from scratch. The combination lets you build devices that would have required a manufacturing run five years ago. That's not hype. It's just what $25 in parts and a weekend can do now.
Frequently Asked Questions
How much does an ESP32 board cost?
The Seeed Studio XIAO ESP32-C3 costs $5 direct from the manufacturer or $10 on Amazon. The ESP32-C6 with Zigbee and Thread support runs $5-12 depending on the retailer.
Do I need to know how to code for these projects?
Basic familiarity with uploading code to a microcontroller helps, but most projects include pre-written code you can flash directly. ESPHome makes some builds completely code-free.
Can I print the enclosures on a budget 3D printer?
Yes. Most designs fit on a 220mm print bed and don't require supports. Any FDM printer with decent calibration will produce usable parts.
What's the difference between mmWave and infrared sensors?
Infrared sensors detect movement. mmWave sensors detect presence, including stationary people, by sensing micro-movements like breathing. mmWave is better for smart home automations where you want lights to stay on while you're sitting still.
Where can I find the STL files for these projects?
All projects mentioned are available on MakerWorld with free STL downloads. Search by project name or creator username to find the files and build instructions.
Need Help Implementing This?
Building smart home devices or exploring IoT for your business? Our team can connect you with embedded systems consultants and hardware prototyping experts. Reach out through our contact page.
Source: How-To Geek
Huma Shazia
Senior AI & Tech Writer
Produced with AI assistance and reviewed by the Logicity editorial team. Learn more in our Editorial Policy.