Key Takeaways

- LoRa radio can extend your smart home range far beyond Wi-Fi or Zigbee limits
- Pixel clocks offer simpler, more usable dashboards than tablet overkill
- Meshtastic provides decentralized mesh networking for distant sensors
Why Go Analog in a Digital Smart Home?
Home Assistant runs on digital automation, but sometimes the best solutions borrow from older technology. Radio communication dates back to Marconi's 1895 Morse code experiments. Pixel displays predate 4K tablets by decades. These technologies still solve problems that modern alternatives overcomplicate.
This weekend's projects skip cloud services, voice assistants, and expensive touchscreens. Instead, they use proven methods to extend range, simplify displays, and hide sensors in plain sight.
Project 1: Use LoRa Radio to Extend Your Smart Home Range
Wi-Fi and Zigbee work fine for most smart home devices. But what happens when your mailbox sits 200 meters from your house? Or your garden shed is behind a concrete wall? Standard protocols fail at distance.
LoRa solves this. It's a low-power radio technology that sends small data packets over distances that would kill a Wi-Fi signal. The tradeoff is bandwidth. You won't stream video over LoRa. But you can send temperature readings, motion alerts, and door states without any internet connection.
Meshtastic is an open-source mesh networking system built on LoRa. Devices form a decentralized network where each node relays messages to extend range further. Your Home Assistant server becomes just another node on the mesh.
A practical example: your mailbox is too far from your Zigbee coordinator for a motion sensor to connect reliably. With Meshtastic, you can put a PIR sensor and LoRa transmitter in the mailbox. When mail arrives, the motion triggers an alert that travels over radio to your Home Assistant server. No repeaters, no Wi-Fi extenders, no cloud.
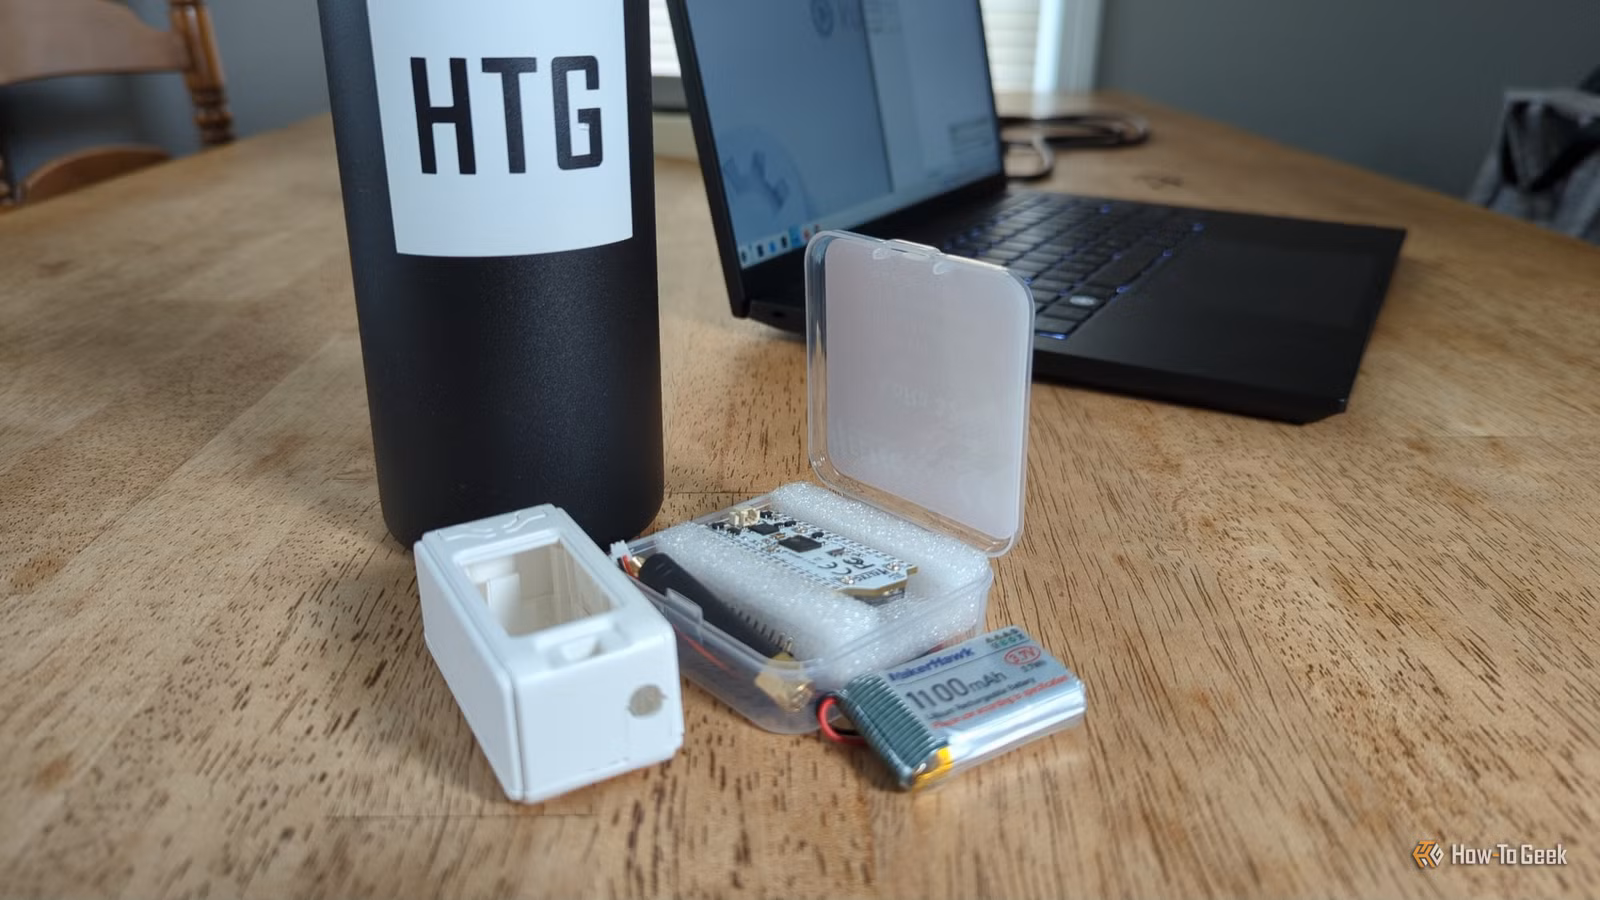
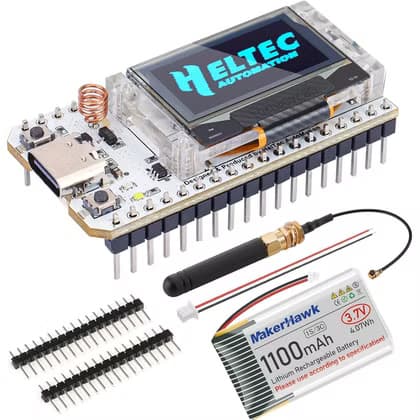
The MakerHawk Heltec V3 ESP32 board costs $27 and includes everything you need: an LED display, 1100mAh battery, USB-C charging, and multiple antennas. Flash Meshtastic firmware and you're ready to connect.
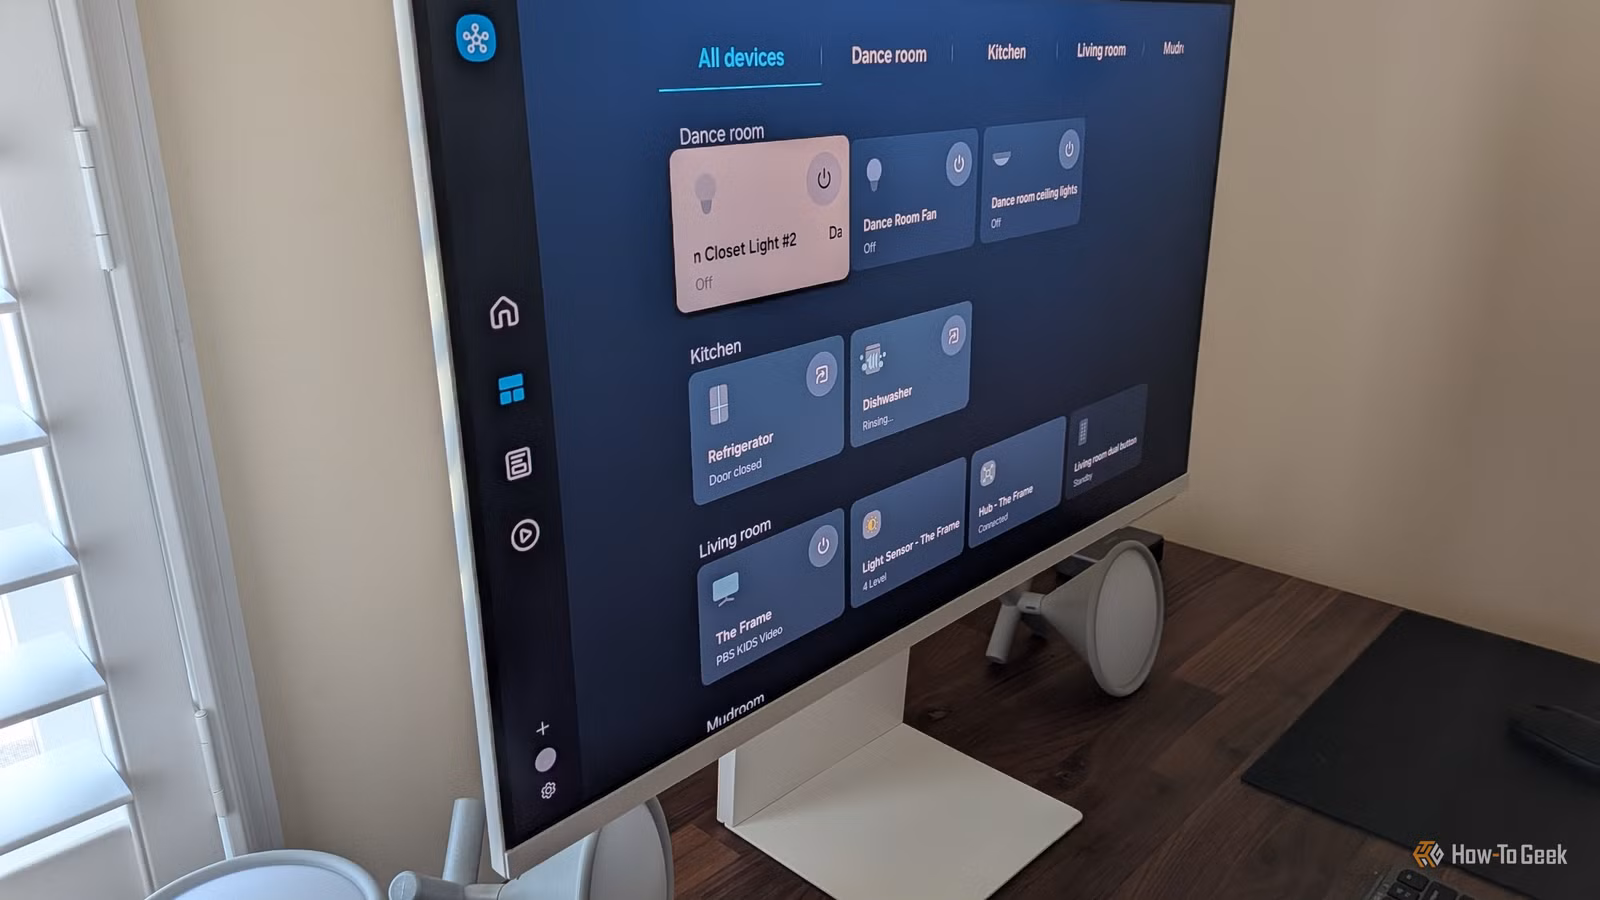
Project 2: Turn a Pixel Clock Into a Home Assistant Display
Tablets make popular smart home dashboards. The problem? High resolution invites clutter. When you can fit 50 widgets on a screen, you eventually will. The result is a dashboard so dense nobody uses it.
Pixel clocks flip this dynamic. Their low resolution forces you to pick what actually matters. Temperature. Weather icon. One or two status indicators. That's it.
These displays integrate with Home Assistant through ESPHome or custom firmware. You configure which data appears and when. The constraints become features. A glance tells you what you need. No scrolling, no tapping, no squinting at tiny text.
Related Home Assistant project approaches
Project 3: Hide Sensors in IKEA Photo Frames
Smart home sensors are functional, not beautiful. Temperature and humidity monitors look like what they are: plastic boxes with exposed electronics. Guests notice them. Partners complain about them.
IKEA photo frames offer a solution. With some basic modification, you can mount sensors behind frames where they remain invisible. The frame looks like decor. The sensor keeps working. Airflow through gaps in the frame backing ensures accurate readings.
This project requires minimal tools. A small drill for ventilation holes, some mounting tape, and patience. The sensor stays accessible for battery changes but hidden from view.
More weekend DIY projects
What You'll Need to Get Started
- LoRa project: ESP32 LoRa board ($27), Meshtastic firmware, PIR sensor
- Pixel clock: Ulanzi TC001 or similar pixel display, ESPHome
- Hidden sensors: IKEA RIBBA frame, temperature/humidity sensor, basic tools
Each project takes a few hours at most. The LoRa setup involves the most configuration since you need to flash firmware and set up the Meshtastic integration. The pixel clock and hidden sensor projects are mostly physical assembly with straightforward Home Assistant integration.
Useful for custom sensor enclosures
Logicity's Take
Frequently Asked Questions
How far can LoRa transmit compared to Wi-Fi?
LoRa can transmit several kilometers in ideal conditions, compared to Wi-Fi's typical 30-50 meter indoor range. In practice, expect hundreds of meters through obstacles versus Wi-Fi's rapid dropoff.
Does Meshtastic require internet access?
No. Meshtastic is fully decentralized and works offline. Devices communicate directly via radio without any cloud service or internet connection.
Can I use any ESP32 board for LoRa projects?
You need an ESP32 board with a LoRa radio module built in. Standard ESP32 boards only have Wi-Fi and Bluetooth. The Heltec V3 and similar boards include the necessary LoRa hardware.
Will hiding sensors in frames affect accuracy?
Minimally. Temperature and humidity sensors need some airflow, which gaps in frame backing provide. Avoid sealed enclosures or direct sunlight on the frame.
Need Help Implementing This?
Source: How-To Geek
Huma Shazia
Senior AI & Tech Writer
Produced with AI assistance and reviewed by the Logicity editorial team. Learn more in our Editorial Policy.