Key Takeaways
- Wi-Fi heatmaps reveal dead zones and help optimize access point placement
- Scrutiny monitors drive health via S.M.A.R.T. data before failures happen
- Uptime Kuma tracks service availability and sends alerts when things break
Your homelab probably runs services you depend on daily. But how do you know when a drive is failing? Or which corner of your house has terrible Wi-Fi? Or whether your self-hosted apps are actually up?
These three projects take a few hours each and solve problems you might not realize you have until something breaks.
1. Build a Wi-Fi Heatmap
Every home has Wi-Fi dead zones. Even with multiple access points, placement matters more than raw signal strength. A heatmap shows you exactly where coverage drops and where your access points overlap or compete.
If you run UniFi gear, the WiFiman app does this for free. Walk through your house with the app open, and it tracks signal strength, throughput, latency, and roaming behavior. On iPhones with LiDAR, you can create a floor plan inside the app itself. It then makes placement recommendations based on your actual layout.
No UniFi system? NetSpot works with any Wi-Fi network. Install it on a laptop, tablet, or phone, upload your floor plan, and walk the space. The app builds a visual map of signal strength throughout your home.
The result: you stop guessing about access point placement. Move that router from the corner to the center of the house. Add a mesh node in the garage. The heatmap shows you what actually works.
Related guide on diagnosing Wi-Fi performance issues
2. Set Up Drive Health Monitoring with Scrutiny
Drives fail. The question is whether you find out before or after you lose data. S.M.A.R.T. monitoring has existed for decades, but most people never check it. Scrutiny makes that data visible and actionable.
Scrutiny is a self-hosted dashboard that pulls S.M.A.R.T. data from all your drives and displays it in one place. It tracks temperature, power-on hours, reallocated sectors, and the other metrics that predict drive failure. When something looks wrong, you get a warning before the drive dies.
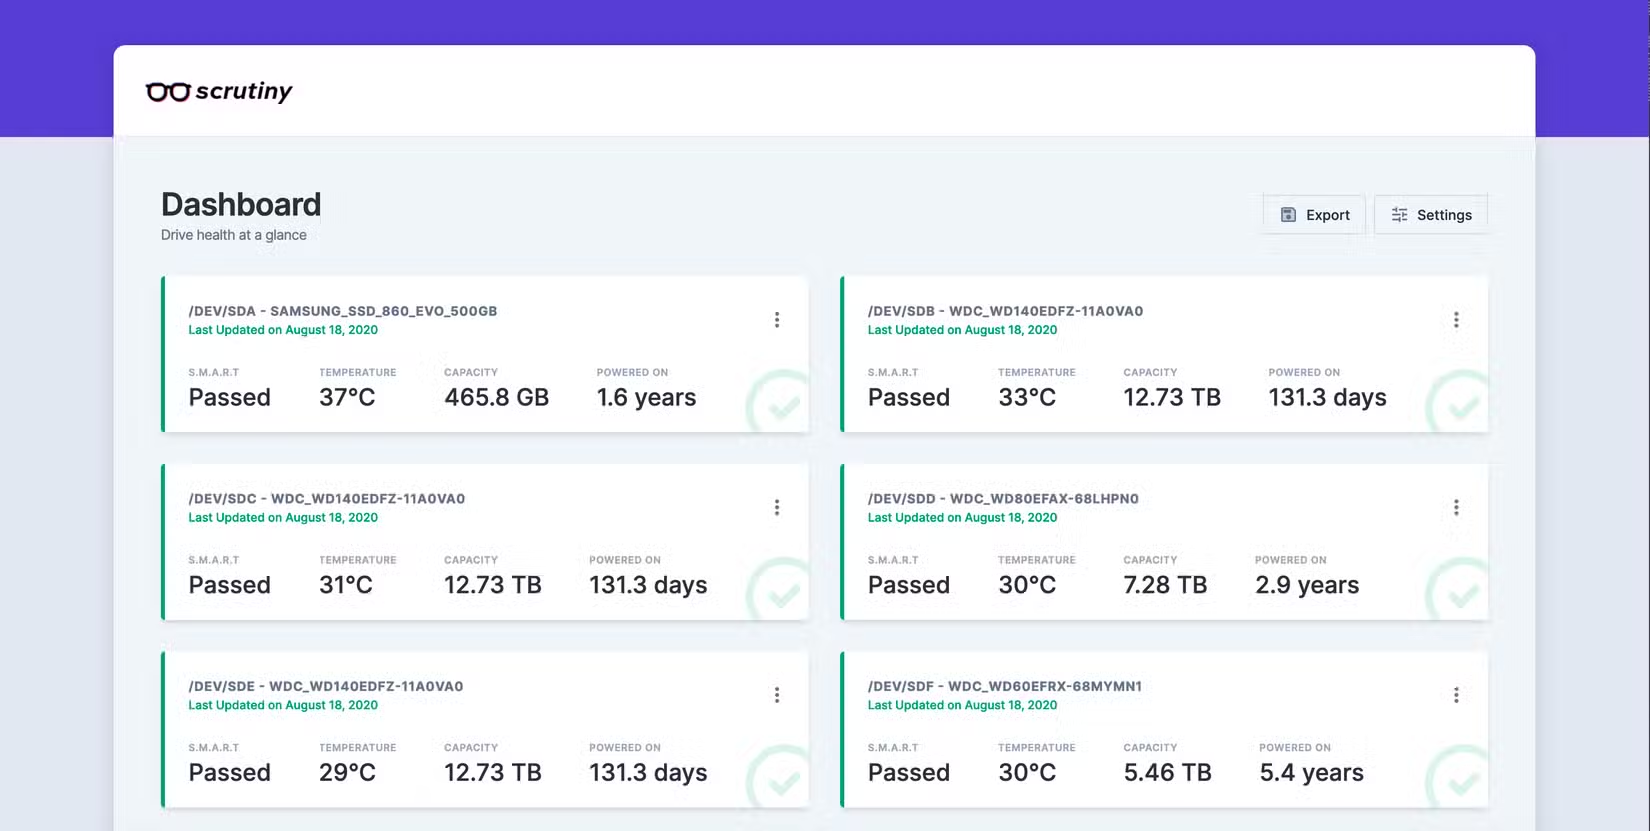
Deploy it via Docker in about 15 minutes. Point it at your drives, and it starts collecting data immediately. The dashboard shows drive health at a glance. Color-coded status makes it obvious when a drive needs attention.
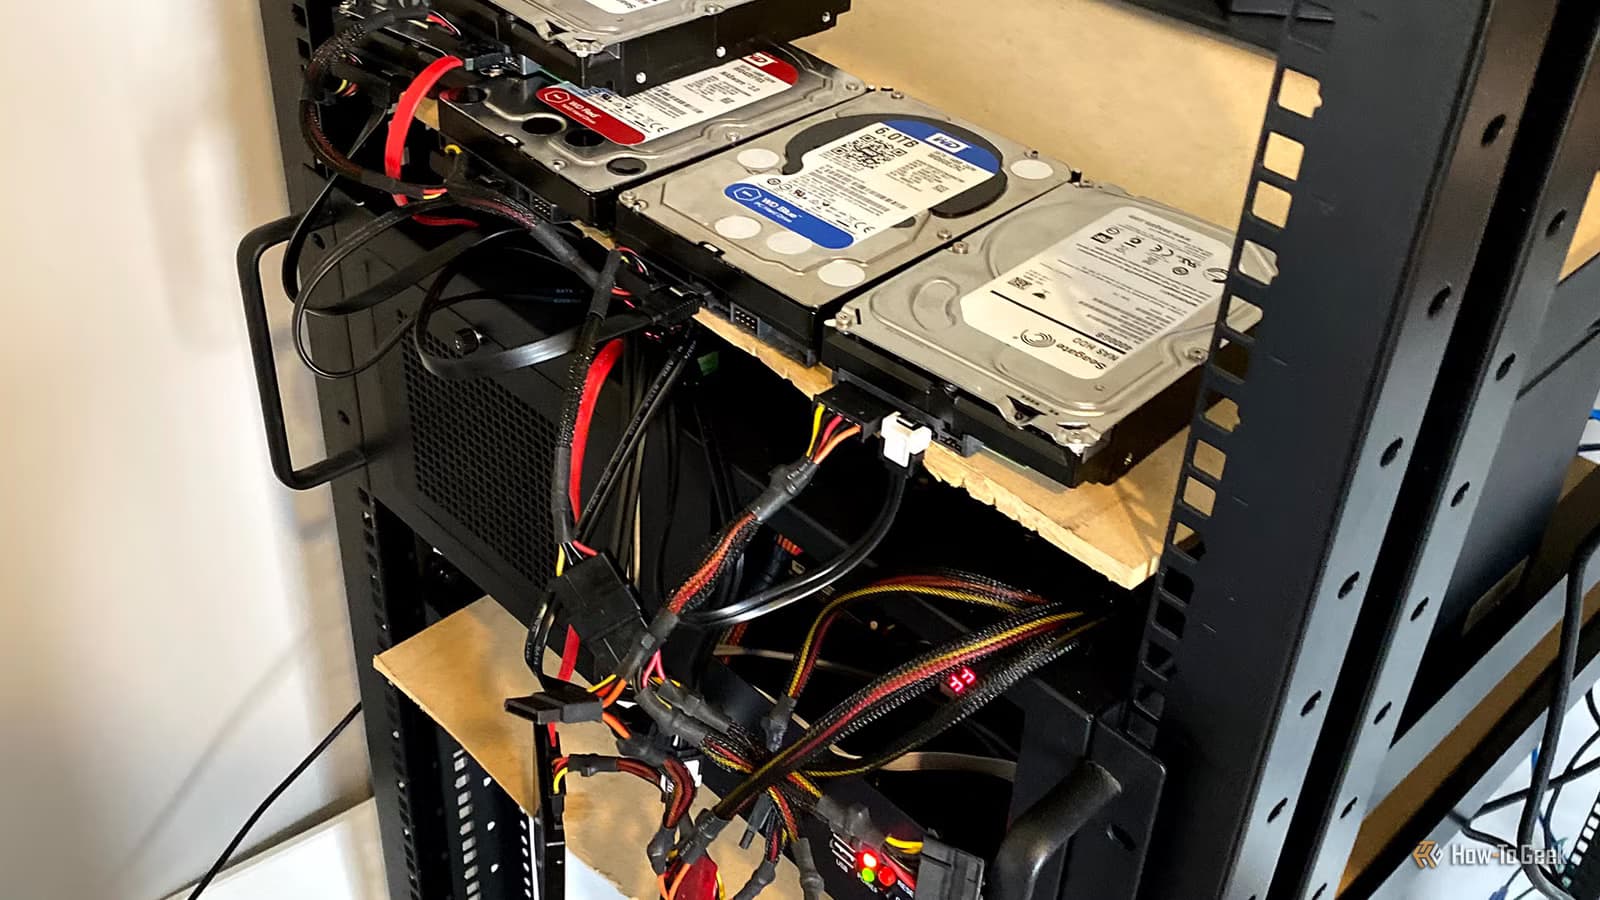
For homelab servers with multiple drives, this is essential. A NAS with 4-8 drives is a ticking clock. One will fail eventually. Scrutiny gives you time to order a replacement and migrate data before that happens.
3. Deploy Uptime Kuma for Service Monitoring
You probably run more services than you think. Plex, Home Assistant, Pi-hole, a reverse proxy, maybe some containers you forgot about. When one goes down, how long until you notice?
Uptime Kuma is a self-hosted monitoring tool that pings your services and alerts you when they stop responding. It supports HTTP, TCP, DNS, and Docker container checks. The dashboard shows uptime percentages and response times. Alerts go to email, Discord, Slack, Telegram, or a dozen other platforms.
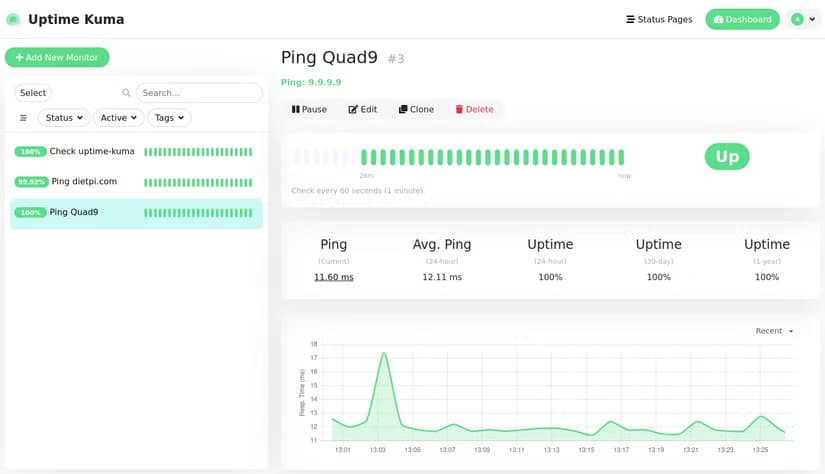
Setup takes 10 minutes via Docker. Add your services, set check intervals, configure notifications. Now when your media server crashes at 2 AM, you know about it before your family complains the next morning.
The status page feature is a nice bonus. You can share a public page showing service status, useful if you host anything for friends or family.
Why These Three Projects
These aren't flashy. They don't add new capabilities to your homelab. But they prevent problems that waste hours of troubleshooting later.
- Wi-Fi heatmaps stop you from rearranging access points blindly
- Drive monitoring catches failures before data loss
- Uptime tracking means you fix outages faster
Each project takes 1-3 hours depending on your setup. All three are self-hosted, free, and run on minimal hardware. A Raspberry Pi handles any of them. A mini PC handles all three.
Logicity's Take
Frequently Asked Questions
What hardware do I need for these homelab projects?
Any Linux machine works. A Raspberry Pi 4 handles all three. A mini PC with Docker is ideal. You can also run them on an existing server.
Is Scrutiny better than the built-in S.M.A.R.T. tools?
Scrutiny visualizes S.M.A.R.T. data and tracks trends over time. The raw tools give you data but no dashboard. For multiple drives, Scrutiny is much easier to monitor.
Can Uptime Kuma monitor external services?
Yes. It can ping any URL or IP address. You can monitor your own public-facing services, or external services you depend on.
Do I need UniFi hardware for the Wi-Fi heatmap?
No. NetSpot works with any Wi-Fi network. UniFi's WiFiman is just a free option for UniFi users.
Need Help Implementing This?
Source: How-To Geek
Huma Shazia
Senior AI & Tech Writer
Produced with AI assistance and reviewed by the Logicity editorial team. Learn more in our Editorial Policy.