Key Takeaways
Windows Disaster Recovery Part1- Create System Restore & Recovery Drive
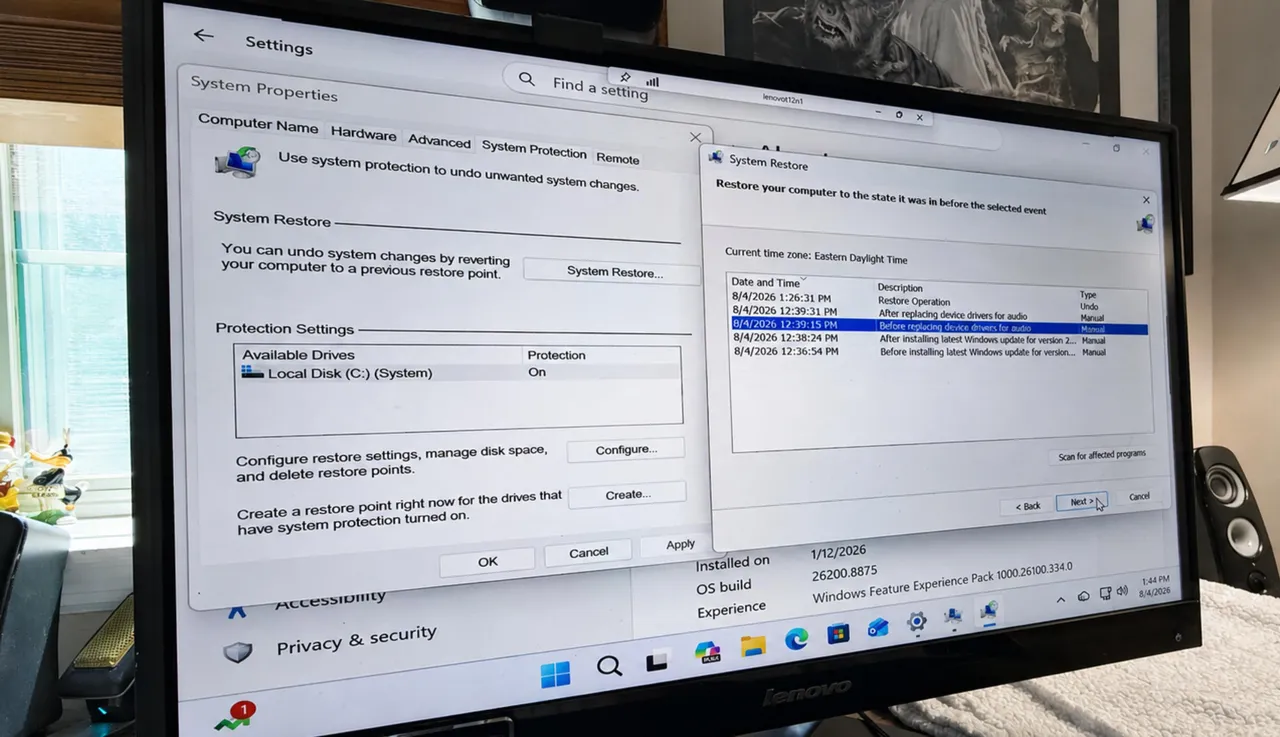
- System Restore captures system files, Registry settings, drivers, and installed programs, but not personal files
- Windows creates automatic restore points before major updates, but manual points before risky changes are smarter
- Allocate disk space based on how often you tinker; points auto-delete when space fills up
Windows 11 System Restore lets you roll back your PC to a known-good state after a bad driver, botched update, or rogue application wrecks something. The feature has existed since Windows ME, and it still works. But it's off by default on many machines, and most users never touch it until they need it, by which point there's nothing to restore.
Setting it up takes under two minutes. Creating a restore point before you install that GPU driver or enable a preview feature takes about ten seconds. This guide walks through configuration, manual point creation, and the actual restore process.
What does System Restore actually capture?
A restore point snapshots your Windows system files, Registry settings, device drivers, and installed programs. It does not touch your documents, photos, downloads, or any personal files. That distinction matters: System Restore is not a backup tool. It's a rollback mechanism for system-level changes.
Windows creates automatic restore points before certain events: major Windows updates, new device driver installations, and some application installs. If no restore point has been created in seven days, Windows will generate one automatically. But automatic points don't cover every risky change. Before you install a beta driver, enable a registry tweak from a forum, or run a system cleanup tool, create a manual point.
How to enable System Restore on Windows 11
- Open Settings, select System, then click About.
- Under Related links, click System protection.
- In the System Properties window that appears, click Configure.
- Select "Turn on system protection."
- Drag the slider to set how much disk space to allocate for restore points. Low on space? Keep it under 5%. Plenty of room? 10-15% gives you a longer history.
- Click OK.
That's it. System Restore is now active. Restore points will consume space up to your limit. When the allocation fills, the oldest point is deleted to make room for new ones.
Creating a manual restore point
The shortcut: click the Search icon, type "System Protection," and select "Create a restore point" from the results.
- In the System Properties window, click the Create button.
- Type a descriptive name. Something like "Before GPU driver 560.94" is more useful than "Backup."
- Click Create.
- Wait a few seconds. A confirmation message appears when the point is saved.
Build the habit: before any driver update, any registry edit, any third-party system tool, create a named restore point. It costs nothing but ten seconds.
Logicity's Take
System Restore is the lowest-friction insurance Windows offers. It won't save you from ransomware or a dead SSD, but it will save you from that driver update that killed your display output or the cleanup utility that broke your Start menu. For anything touching personal files or full-system recovery, pair it with File History and a disk imaging tool like Macrium Reflect or the built-in Windows Backup.
How to restore your PC to a previous point
When something goes wrong, slow boot, crashing apps, missing system features, and you've exhausted other troubleshooting, System Restore is the rollback option.
- Open the System Properties window (Search > "System Protection" > "Create a restore point").
- Click System Restore.
- Click Next to see available restore points.
- Select the point you want to restore to. If you named your points clearly, this is easy. If not, check the date and time.
- Click "Scan for affected programs" to see which applications will be removed or rolled back.
- Click Next, then Finish.
- Confirm the restore. Your PC will restart and apply the changes.
The restore process typically takes 10-30 minutes depending on how much changed since that point was created. Your personal files remain untouched throughout.
What if Windows won't boot at all?
If your PC can't reach the desktop, you can still access System Restore from the Windows Recovery Environment. Force-restart your PC three times during boot (hold the power button as it starts), and Windows will enter recovery mode. From there, select Troubleshoot > Advanced options > System Restore.
This works only if you had System Restore enabled and had at least one restore point saved. If you're reading this after the crash, you're out of luck. If you're reading this before, go enable it now.
Frequently Asked Questions
Does System Restore delete my files?
No. System Restore affects only system files, Registry settings, drivers, and installed programs. Documents, photos, and downloads remain unchanged.
How much disk space should I allocate?
5% is enough for a few restore points. 10-15% gives you a longer history, useful if you frequently install new software or drivers.
Can I undo a restore?
Yes. Before restoring, Windows creates a new restore point capturing the current state. If the restore makes things worse, you can roll back to that point.
Why is System Restore disabled by default?
On some machines, OEMs disable it to save disk space. Check System Protection settings to confirm it's enabled on your device.
Need Help Implementing This?
Logicity covers Windows administration, cloud infrastructure, and IT decision-making for tech leads. Subscribe to our newsletter for weekly guides and analysis.
Source: Latest news
Manaal Khan
Tech & Innovation Writer
Produced with AI assistance and reviewed by the Logicity editorial team. Learn more in our Editorial Policy.