6 Reasons Your 3D Prints Look Fine but Feel Weak
Key Takeaways
- 15% infill density is too low for load-bearing parts. Increase to 30-50% for durability.
- Gyroid and cubic infill patterns outperform grid for both tensile and compression strength.
- Adding wall loops strengthens perimeters more efficiently than increasing infill alone.
You've dialed in your printer. First layers stick. Surfaces look clean. Dimensional accuracy is within tolerance. But the moment you put stress on the part, it cracks, bends, or snaps entirely.
This disconnect between appearance and performance frustrates makers at every skill level. The good news: the fix rarely requires new hardware. Most weak prints trace back to slicer settings that prioritize speed or material savings over structural integrity.
Here are six reasons your prints fail under load and what to change.
1. Infill Density Is Too Low
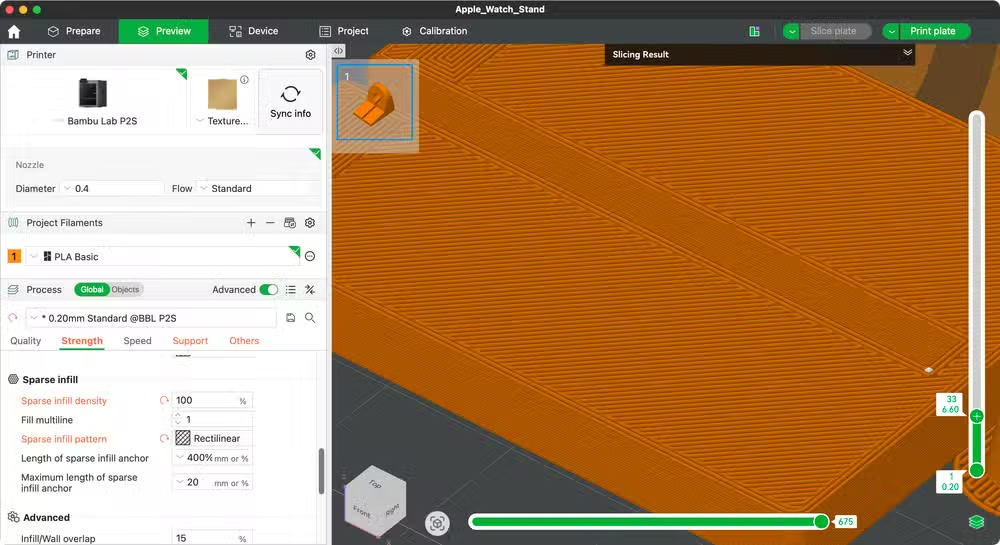
Infill density determines how much of your print's interior is filled with material versus left hollow. Most slicers default to 15%, which works for decorative objects and prototypes but leaves functional parts vulnerable.
At 15%, your print is mostly air. That's fine for a phone stand that holds 200 grams. It's not fine for a bracket holding a shelf or a clip under constant tension.
For parts that bear weight, absorb impacts, or resist bending, bump infill to 30-50%. For maximum strength and you're willing to use more filament and print time, 100% creates a solid part. This is expensive in both material and hours, but sometimes necessary.
Going the other direction: if you're iterating on a design and just need to check fit, drop to 2%. You'll save filament on test prints that go in the trash anyway.
2. Your Infill Pattern Underperforms
Density tells your printer how much infill to use. Pattern tells it how to arrange that material. Not all patterns perform equally.
Many slicers default to grid, which deposits filament in straight perpendicular lines. It's fast to compute and print. It's also structurally mediocre.
Testing by All3DP found that cubic and gyroid patterns deliver superior performance for both tensile strength (resisting bending and stretching) and compression strength (bearing weight from above).
Triangles work well as a general-purpose option. Concentric patterns excel along the Z-axis, making them ideal for tall prints where vertical loads matter most.
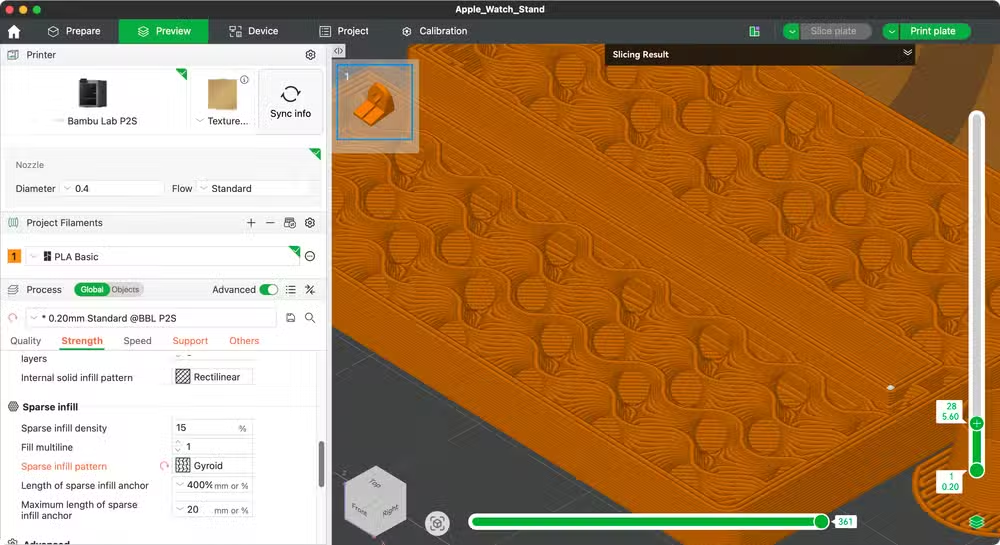
Switching patterns costs nothing in material. The only tradeoff is print time. Gyroid and cubic take slightly longer to slice and print than simple grid, but the strength gains justify it for functional parts.
3. Not Enough Wall Loops
Wall loops, also called perimeters, define how many passes your printer makes around the outer edge of each layer. Two loops is a common default. For decorative prints, that's enough.
For structural parts, it's not. The perimeter is often where stress concentrates. A thin shell cracks before the infill even comes into play.
Increasing wall loops to three or four creates a thicker, stiffer shell. This matters especially for parts with thin cross-sections or sharp corners where cracks tend to initiate.
In some cases, adding wall loops is more efficient than increasing infill. A thick perimeter uses less material than filling the interior and provides comparable or better impact resistance.
4. Layer Adhesion Problems
Prints fail in two primary modes: across layers (cracks running perpendicular to print lines) or between layers (delamination). The second type indicates poor layer adhesion.
When one layer doesn't bond fully to the layer below, the print develops weak planes. Apply force along these planes and the part separates like a stack of cards.
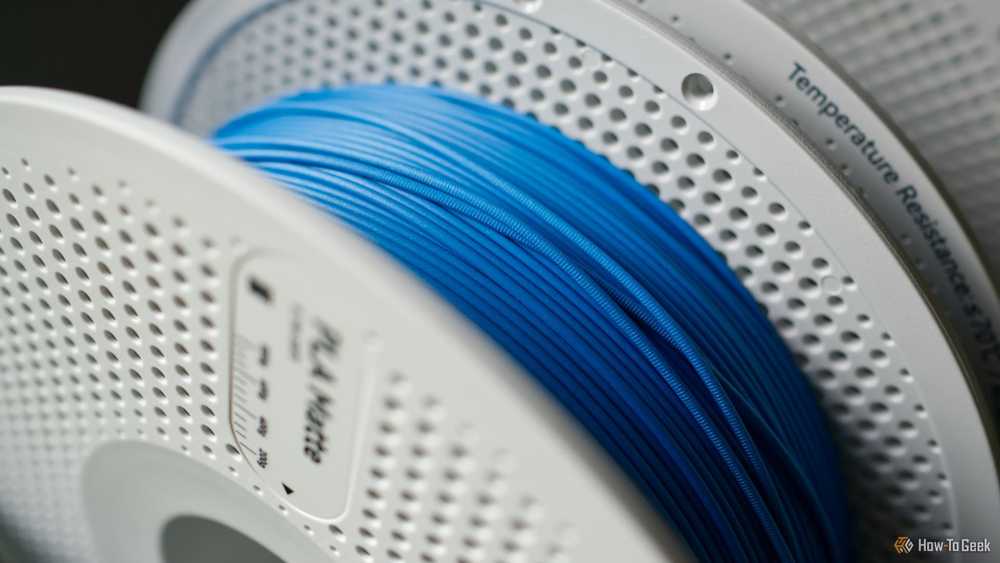
Common causes include printing too fast, printing too cold, or insufficient part cooling causing warping that lifts layers apart. Moisture in your filament also degrades adhesion by creating steam pockets between layers.
If your prints snap cleanly between layers, slow down, raise nozzle temperature by 5-10°C, and make sure your filament is dry.
5. Wrong Material for the Job
PLA is the default filament for good reason. It prints easily, smells mild, and produces attractive surfaces. It's also brittle. Under sudden impact or sustained stress, PLA cracks.
For parts that need to flex without breaking, PETG offers better impact resistance. For parts exposed to heat or chemicals, ABS or ASA handle the environment better. For maximum toughness, nylon and polycarbonate deliver engineering-grade performance at the cost of printer requirements and print difficulty.
Material choice is often the limiting factor. You can't engineer your way past PLA's brittleness with slicer settings alone. Sometimes the answer is switching filament.
6. Print Orientation Works Against You
3D printed parts are anisotropic. They're stronger in some directions than others. Layer lines create natural weak points. Force applied perpendicular to layers tends to cause delamination. Force applied parallel to layers encounters more continuous material paths.
When you orient a part for printing, you're deciding where the weak planes land. A hook printed vertically has layers running horizontally. Hang weight from it and you're pulling layers apart. Print the same hook on its side, and the load runs along the layers instead of across them.
Think about how your part will be loaded before you hit slice. Sometimes a different orientation eliminates the failure mode entirely.
Logicity's Take
Putting It Together
Weak prints rarely have a single cause. More often, several factors compound. Low infill combined with a weak pattern, thin walls, and poor orientation creates a part that fails under loads it should handle easily.
Start with orientation. Get the layer lines running the right direction for your load case. Then increase wall loops to three or four. Then choose gyroid or cubic infill at 30% or higher. If parts still fail, consider switching from PLA to PETG or nylon.
Each change trades print time or material cost for durability. The right balance depends on whether you're making one part or a hundred, and how much strength that part actually needs.
Frequently Asked Questions
What infill percentage should I use for strong 3D prints?
For functional parts under load, use 30-50% infill. The common 15% default works for decorative objects but leaves structural parts vulnerable to cracking or bending under stress.
Which infill pattern is strongest for 3D printing?
Gyroid and cubic patterns outperform grid for both tensile and compression strength according to All3DP testing. Triangles work well as a general-purpose option.
Why do my 3D prints break between layers?
Layer delamination indicates poor adhesion. Common causes include printing too fast, nozzle temperature too low, or moisture in your filament creating steam pockets between layers.
Is PLA strong enough for functional parts?
PLA is brittle and cracks under sudden impact or sustained stress. For parts needing flexibility, use PETG. For high-stress applications, consider nylon or polycarbonate.
How does print orientation affect part strength?
3D printed parts are weaker across layer lines than along them. Orient parts so expected loads run parallel to layers rather than perpendicular, which would pull layers apart.
Another practical guide for evaluating when your hardware needs adjustment versus replacement.
Need Help Implementing This?
Source: How-To Geek
Manaal Khan
Tech & Innovation Writer
اقرأ أيضاً

رأي مغاير: كيف يؤثر اختراق الأمن الداخلي الأميركي على شركاتنا الخاصة؟
في ظل اختراق عقود الأمن الداخلي الأميركي مع شركات خاصة، نناقش تأثير هذا الاختراق على مستقبل الأمن السيبراني. نستعرض الإحصاءات الموثوقة ونناقش كيف يمكن للشركات الخاصة أن تتعامل مع هذا التهديد. استمتع بقراءة هذا التحليل العميق

الإنسان في زمن ما بعد الوجود البشري: نحو نظام للتعايش بين الإنسان والروبوت - Centre for Arab Unity Studies
في هذا المقال، سنناقش كيف يمكن للبشر والروبوتات التعايش في نظام متكامل. سنستعرض التحديات والحلول المحتملة التي تضعها شركات مثل جوجل وأمازون. كما سنلقي نظرة على التوقعات المستقبلية وفقًا لتقرير ماكنزي

إطلاق ناسا لمهمة مأهولة إلى القمر: خطوة تاريخية نحو استكشاف الفضاء
تعتبر المهمة الجديدة خطوة هامة نحو استكشاف الفضاء وتطوير التكنولوجيا. سوف تشمل المهمة إرسال رواد فضاء إلى سطح القمر لconducting تجارب علمية. ستسهم هذه المهمة في تطوير فهمنا للفضاء وتحسين التكنولوجيا المستخدمة في استكشاف الفضاء.