5 ESP32 Projects You Can Build in a Weekend
Key Takeaways
- ESP32 boards like the Seeed Studio XIAO ESP32-C3 cost $5 and include Wi-Fi and Bluetooth
- A Bluetooth proxy for Home Assistant is the simplest starter project and requires zero soldering
- ESPHome's web flasher lets you install firmware in Chrome or Edge without command-line tools
You just unboxed an ESP32 development board. Before you dive into a multi-day build that needs custom PCBs and 3D-printed enclosures, start with something you can finish this weekend. These five projects teach the basics: how to flash firmware, connect components on a breadboard, and write simple code. None of them require soldering.
What You Need to Get Started
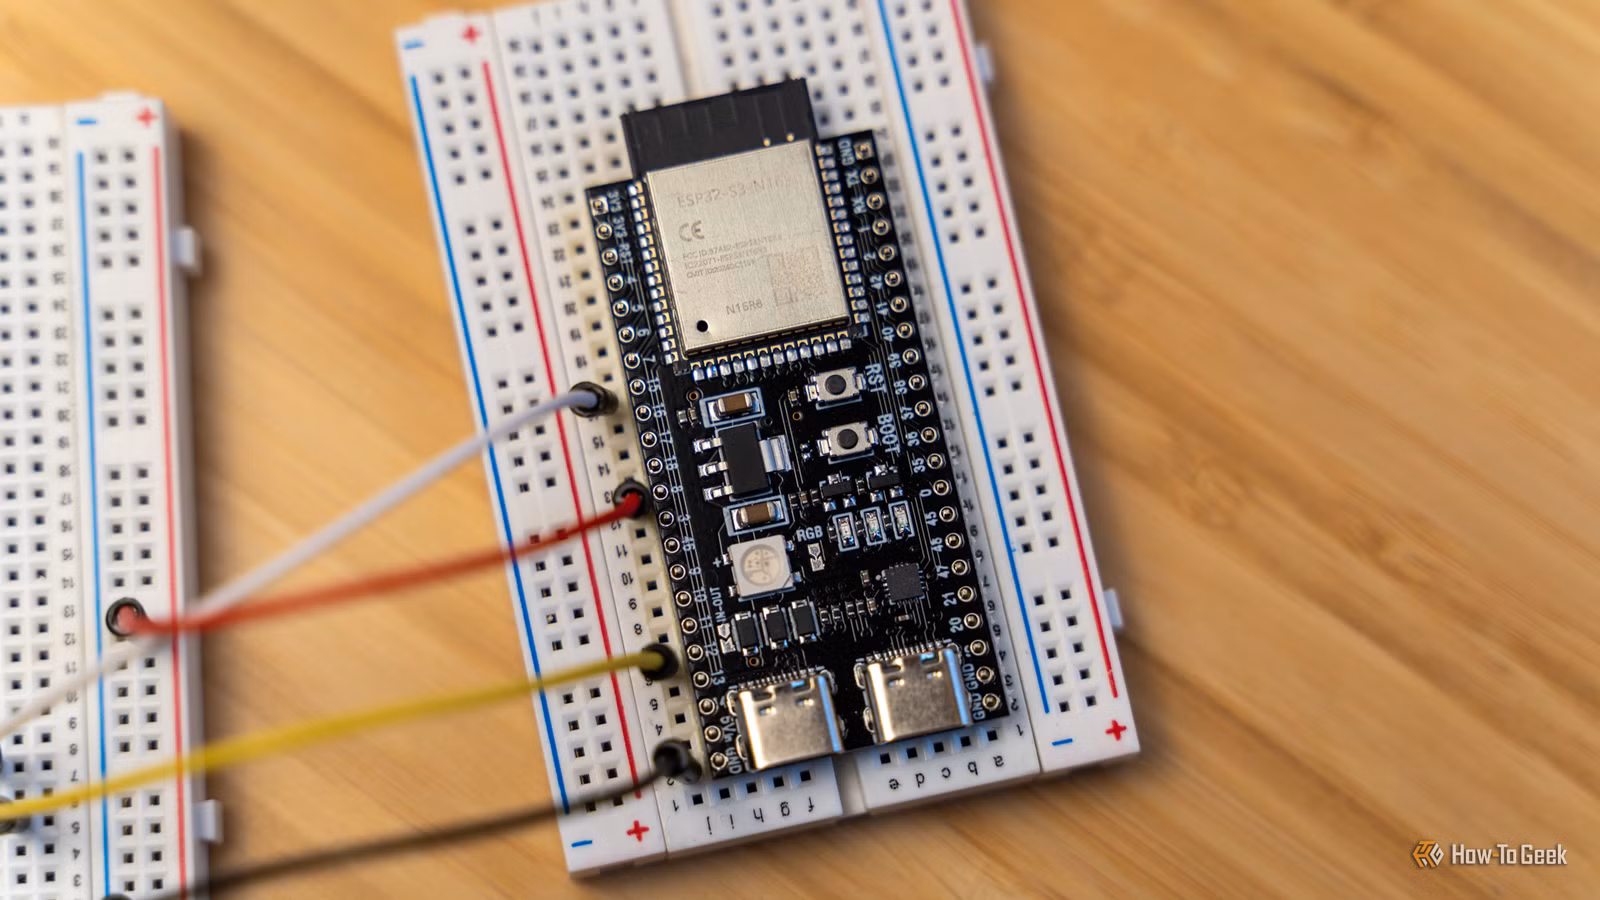
The Seeed Studio XIAO ESP32-C3 is a $5 microcontroller with Wi-Fi and Bluetooth built in. It also has a deep sleep mode that cuts power usage when the board isn't doing anything. The compact size makes it ideal for smart home projects. If you want Zigbee and Thread support, the XIAO ESP32-C6 costs $5 direct from Seeed Studio or $12 on Amazon. Both boards work with ESPHome, which integrates with Home Assistant.

For most projects, you'll also need a breadboard, jumper wires, and a USB cable to connect the ESP32 to your computer. Some projects require additional components like LEDs, resistors, or sensors. We'll call out what each project needs.
1. Bluetooth Proxy for Home Assistant
This is the easiest project on the list. If you run Home Assistant, a Bluetooth proxy extends the range of Bluetooth devices throughout your house. You can also use it for presence detection based on smartphone or other Bluetooth beacon signatures.
Plug your ESP32 into a computer and open Google Chrome or Microsoft Edge. Go to ESPHome's web flasher. Select the Bluetooth proxy project, specify your Wi-Fi credentials, and click install. The flasher does the rest. Once it's done, add the device to Home Assistant like any other integration.
Deploy a few of these around your house and you can control Bluetooth devices from anywhere. No breadboard, no coding, no soldering. Just plug, flash, and go.
2. ESP32 Web Server with LEDs
This project introduces breadboards and basic components. You'll wire an LED to your ESP32, then control it from a web page hosted on the board itself.
Connect the LED's positive leg to a GPIO pin on the ESP32 through a 220-ohm resistor. Connect the negative leg to ground. Write a simple Arduino sketch that creates a web server. When you visit the ESP32's IP address in a browser, you see buttons to turn the LED on and off.
This project teaches you how GPIO pins work, how to wire components on a breadboard, and how to run a web server on a microcontroller. You can expand it by adding more LEDs or other components.
3. Distance Sensor for Home Automation
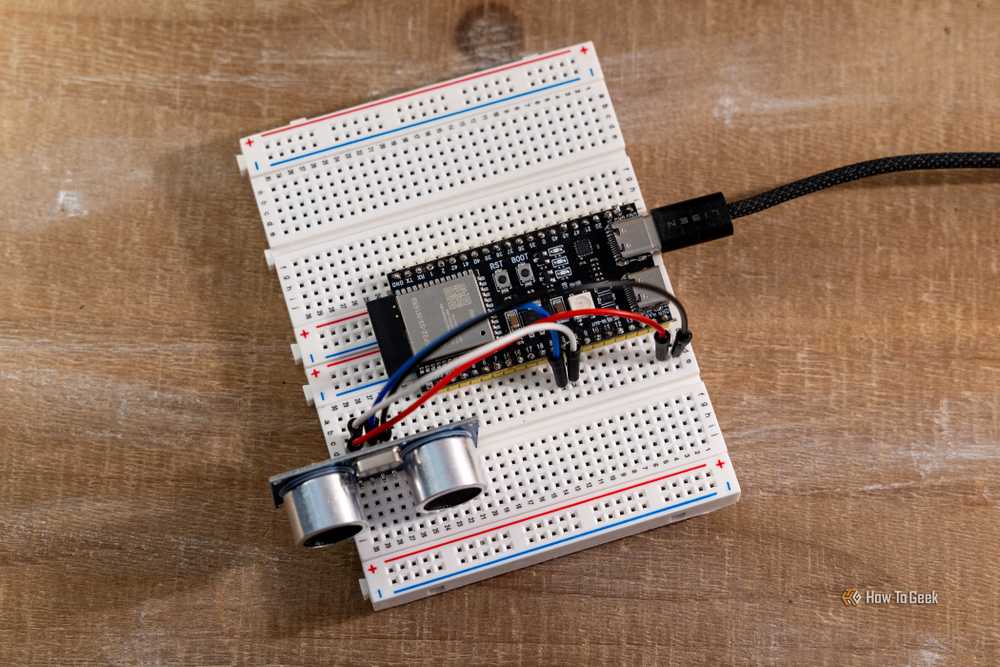
An ultrasonic sensor measures distance by sending out sound waves and timing how long they take to bounce back. The HC-SR04 sensor costs about $3 and connects to the ESP32 with four jumper wires.
Wire the sensor's VCC pin to the ESP32's 5V pin, GND to ground, TRIG to a GPIO pin, and ECHO to another GPIO pin. Upload code that reads the sensor and sends the distance measurement to Home Assistant via ESPHome. You can use this to detect when a car pulls into your garage, when someone approaches your door, or when a bin is full.
The ESPHome documentation has ready-made code for the HC-SR04. Copy it, adjust the pin numbers, and flash. You'll see distance readings in Home Assistant within minutes.
4. Temperature and Humidity Monitor
The DHT22 sensor measures temperature and humidity. It connects to the ESP32 with three wires: power, ground, and data. ESPHome supports it out of the box.
Wire the sensor to a 3.3V pin, a ground pin, and a GPIO pin. Add a DHT22 entry to your ESPHome YAML file, specify the data pin, and flash. The ESP32 will report temperature and humidity to Home Assistant every few seconds. Use the data to trigger automations like turning on a dehumidifier or opening a window.
This project introduces sensors that report analog data instead of digital on/off states. It's a step toward more complex builds like weather stations or environmental monitors.
5. Motion-Activated Light
A PIR motion sensor detects movement and outputs a high signal when it sees someone. Connect it to the ESP32 and use ESPHome to trigger a light or send a notification to Home Assistant.
Wire the sensor's VCC pin to 5V, GND to ground, and OUT to a GPIO pin. In ESPHome, configure a binary sensor that monitors the GPIO pin. Add an automation that turns on a light when motion is detected and turns it off after a set delay.
This project teaches you how to work with binary sensors and automations. You can expand it by adding multiple sensors, adjusting sensitivity, or integrating with other smart home devices.
Logicity's Take
After mastering DIY ESP32 projects, see which smart home devices are worth buying off-the-shelf
Frequently Asked Questions
Do I need to know how to code to build ESP32 projects?
No. ESPHome provides ready-made configurations you can copy and modify. For the Bluetooth proxy project, you don't write any code at all. For other projects, you'll adjust a few lines in a YAML file or Arduino sketch. The documentation includes examples for most sensors and components.
Can I use these ESP32 projects without Home Assistant?
Yes. The web server project runs standalone. You can also configure ESPHome to work with MQTT, which integrates with other smart home platforms like OpenHAB or Node-RED. Some projects, like the Bluetooth proxy, are designed specifically for Home Assistant and won't work elsewhere.
What's the difference between the ESP32-C3 and ESP32-C6?
The ESP32-C6 adds Zigbee, Z-Wave, Matter, and Thread support plus Wi-Fi 6. The ESP32-C3 has Wi-Fi 4 and Bluetooth. If you're only building Wi-Fi or Bluetooth projects, the C3 is fine. If you want to integrate with Zigbee or Thread devices, get the C6.
Where do I find code and wiring diagrams for these projects?
The ESPHome documentation has step-by-step guides for hundreds of sensors and components. For Arduino-based projects, sites like Random Nerd Tutorials and the official Arduino project hub have complete examples with wiring diagrams and code you can copy.
Can I power an ESP32 with batteries instead of USB?
Yes. The ESP32 has a deep sleep mode that uses very little power. With a 3.7V lithium battery and a voltage regulator, you can run sensor projects for weeks or months between charges. The XIAO boards have built-in battery management circuits that make this easier.
Need Help Implementing This?
Source: How-To Geek
Huma Shazia
Senior AI & Tech Writer
اقرأ أيضاً

رأي مغاير: كيف يؤثر اختراق الأمن الداخلي الأميركي على شركاتنا الخاصة؟
في ظل اختراق عقود الأمن الداخلي الأميركي مع شركات خاصة، نناقش تأثير هذا الاختراق على مستقبل الأمن السيبراني. نستعرض الإحصاءات الموثوقة ونناقش كيف يمكن للشركات الخاصة أن تتعامل مع هذا التهديد. استمتع بقراءة هذا التحليل العميق

الإنسان في زمن ما بعد الوجود البشري: نحو نظام للتعايش بين الإنسان والروبوت - Centre for Arab Unity Studies
في هذا المقال، سنناقش كيف يمكن للبشر والروبوتات التعايش في نظام متكامل. سنستعرض التحديات والحلول المحتملة التي تضعها شركات مثل جوجل وأمازون. كما سنلقي نظرة على التوقعات المستقبلية وفقًا لتقرير ماكنزي

إطلاق ناسا لمهمة مأهولة إلى القمر: خطوة تاريخية نحو استكشاف الفضاء
تعتبر المهمة الجديدة خطوة هامة نحو استكشاف الفضاء وتطوير التكنولوجيا. سوف تشمل المهمة إرسال رواد فضاء إلى سطح القمر لconducting تجارب علمية. ستسهم هذه المهمة في تطوير فهمنا للفضاء وتحسين التكنولوجيا المستخدمة في استكشاف الفضاء.