How to Hide 3D Print Seams: A Practical Guide
Key Takeaways
- Seams form where each layer starts and stops. They're unavoidable in FDM printing.
- Preview seam locations in your slicer before printing to catch ugly placements early.
- Scarf Joint technology in OrcaSlicer can reduce seam visibility by about 50% on curved surfaces.
If you've noticed small vertical lines running up your 3D prints, you've encountered seams. They look like scars. They're annoying. And they're a fundamental part of how FDM printers work. The good news: you can't eliminate them, but you can hide them.
What Causes Seams in 3D Printing?
FDM printers build objects line by line, layer by layer. The print head moves around the bed, depositing filament wherever needed. When one line finishes and the next begins, a seam forms at that transition point.
Picture a square object. The printer needs to draw a line around its entire perimeter. Since lines can't overlap, a small gap appears where the start meets the end. Stack enough of these gaps in the same spot, and you get a visible vertical seam.
“The Z-seam isn't a flaw in your printer; it's a fundamental consequence of how FDM technology builds parts layer-by-layer. The goal isn't to remove it, but to manipulate the slicer so it's hidden where the eye naturally misses it.”
— Angus Deveson, Founder of Maker's Muse
Some objects hide seams naturally. A box with sharp corners gives the slicer easy places to tuck the start/stop points. But cylindrical objects or smooth curves? Those are seam nightmares.
Why Some Prints Look Worse Than Others
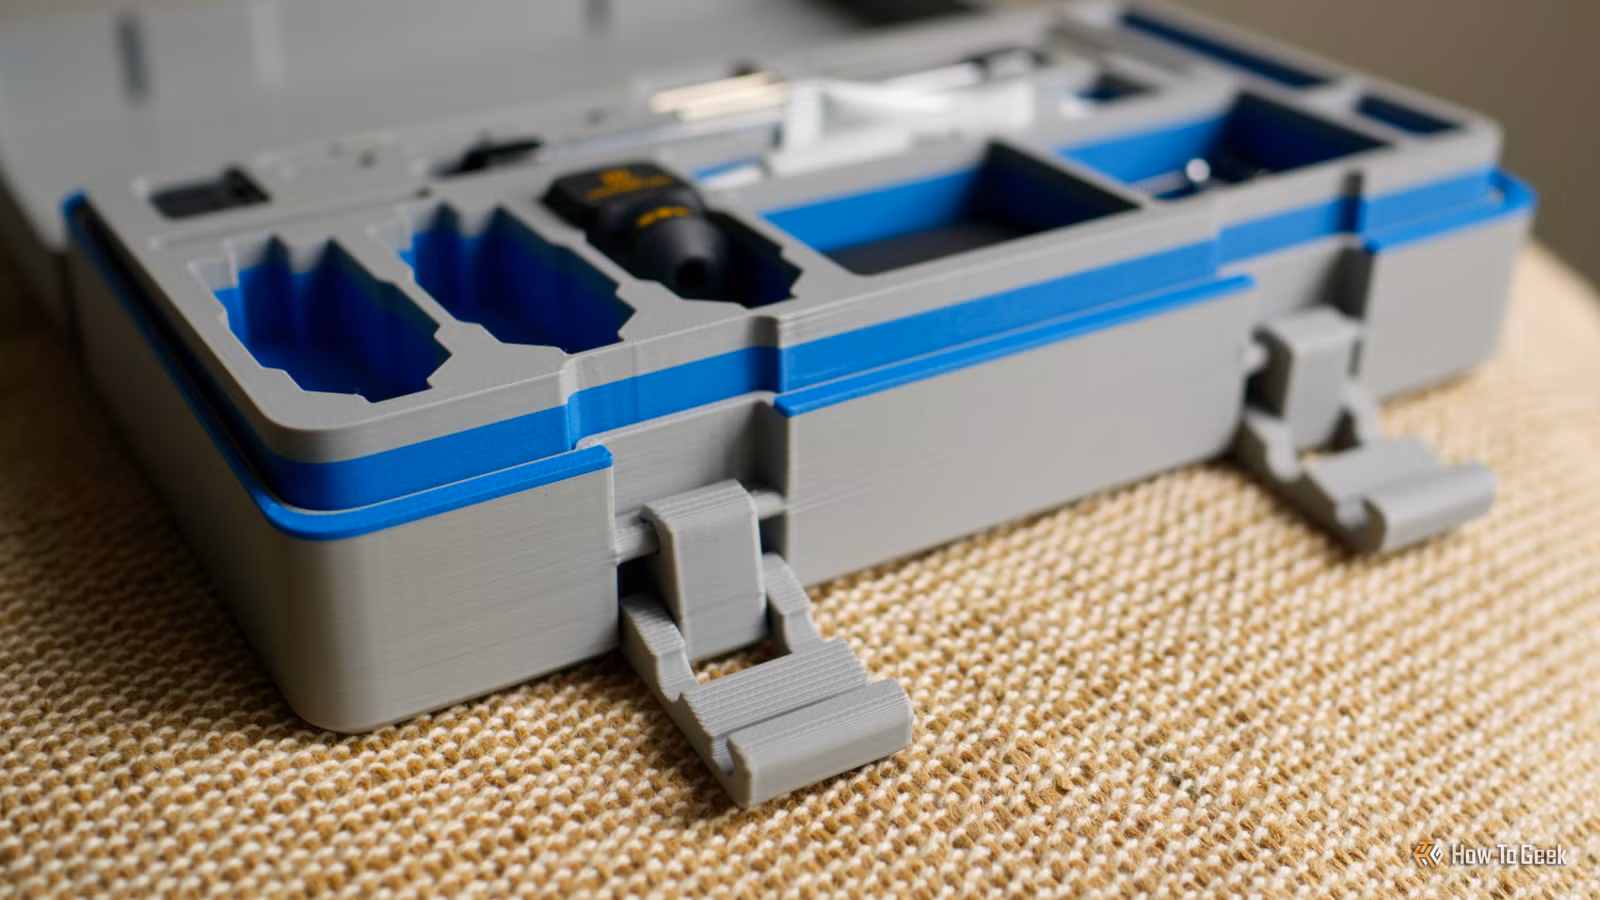
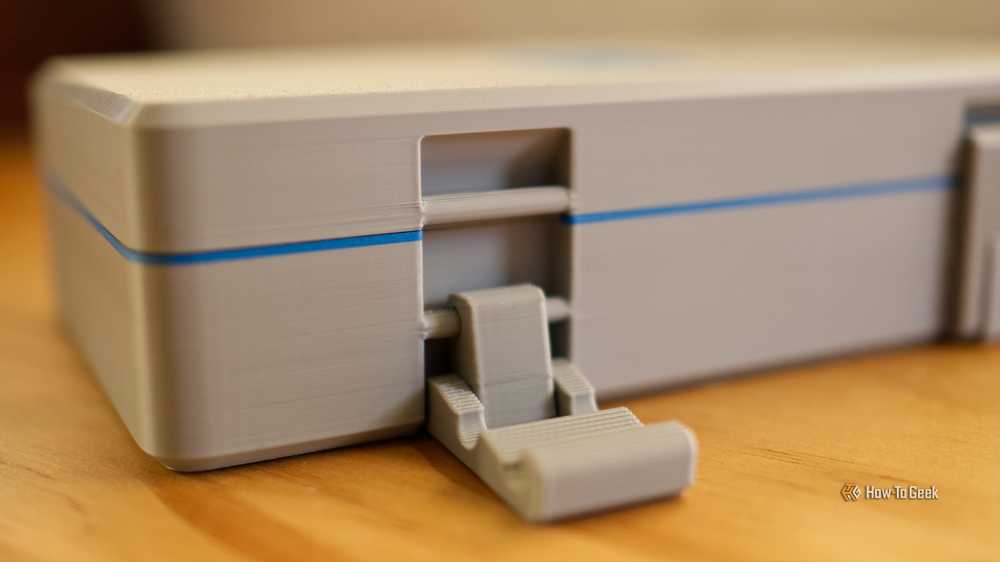
Tim Brookes at How-To Geek printed a toolbox that shows this problem clearly. The back of the toolbox has obvious seams running up the surface. But the front looks clean. Why?
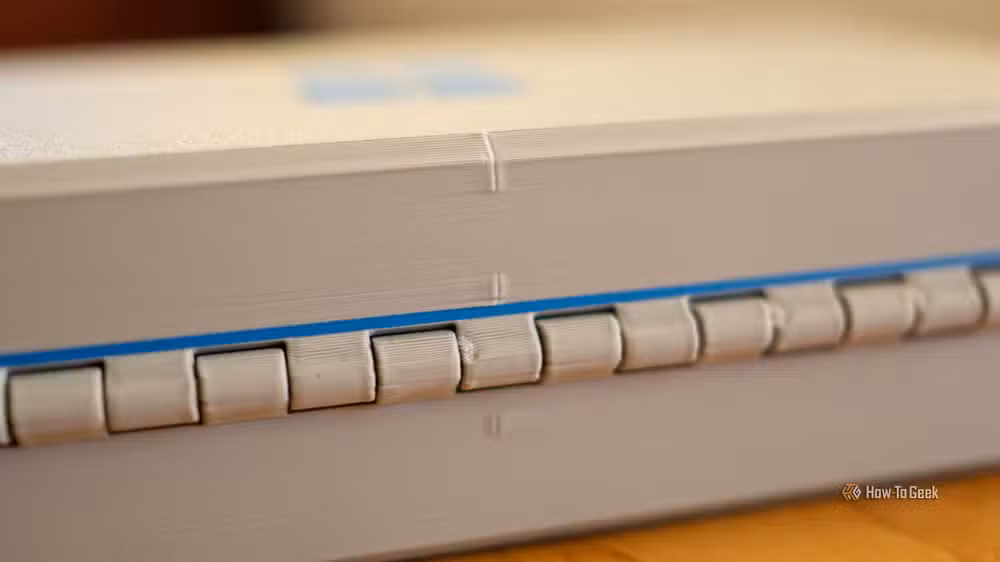
The hinges. Their 90-degree angles gave the slicer natural hiding spots. The seams still exist on the front, but they're tucked into corners where your eye doesn't notice them. This is what smart seam placement looks like.
Preview Seam Locations Before You Print
Every major slicer lets you preview where seams will land before you commit to a print. This is your first line of defense.
In Bambu Studio, PrusaSlicer, and OrcaSlicer, slice your model and look at the layer preview. Seam positions are usually marked with small dots or highlighted lines. If they're landing on a visible face, you can adjust settings before wasting filament.
Seam Painting: Manual Control
When automatic placement fails, seam painting gives you manual control. This feature lets you paint directly on your 3D model to tell the slicer exactly where seams should (or shouldn't) go.
In PrusaSlicer and Bambu Studio, you'll find a brush tool specifically for this. Paint green zones where you want seams. Paint red zones where you want to avoid them. The slicer will respect these preferences when calculating toolpaths.
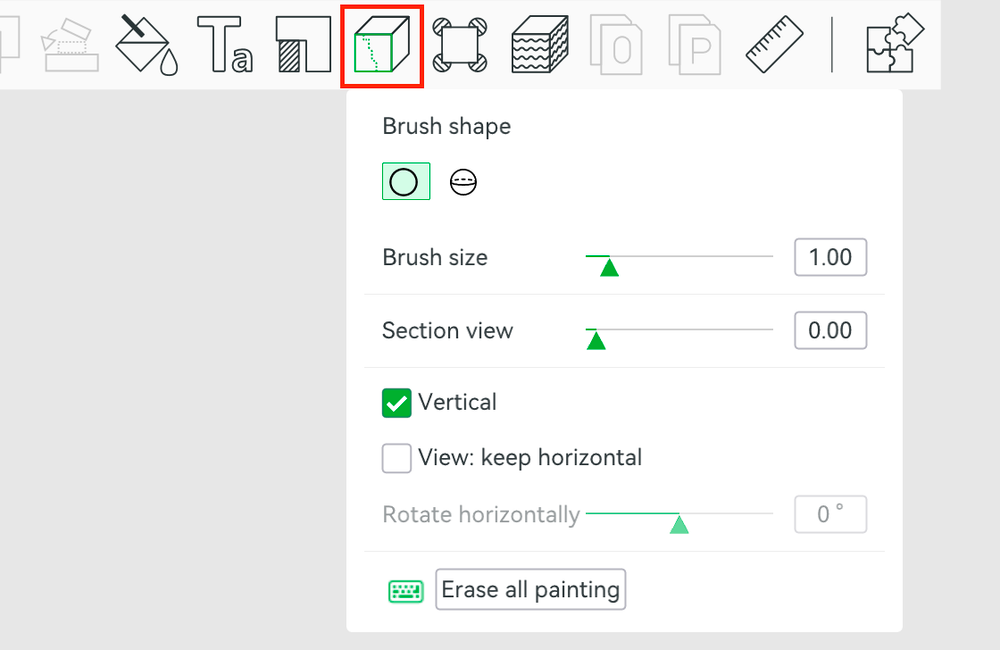
This works well for hiding seams behind features, in crevices, or on the back side of display pieces. It takes a few extra minutes but can make the difference between a print you're proud of and one you hide.
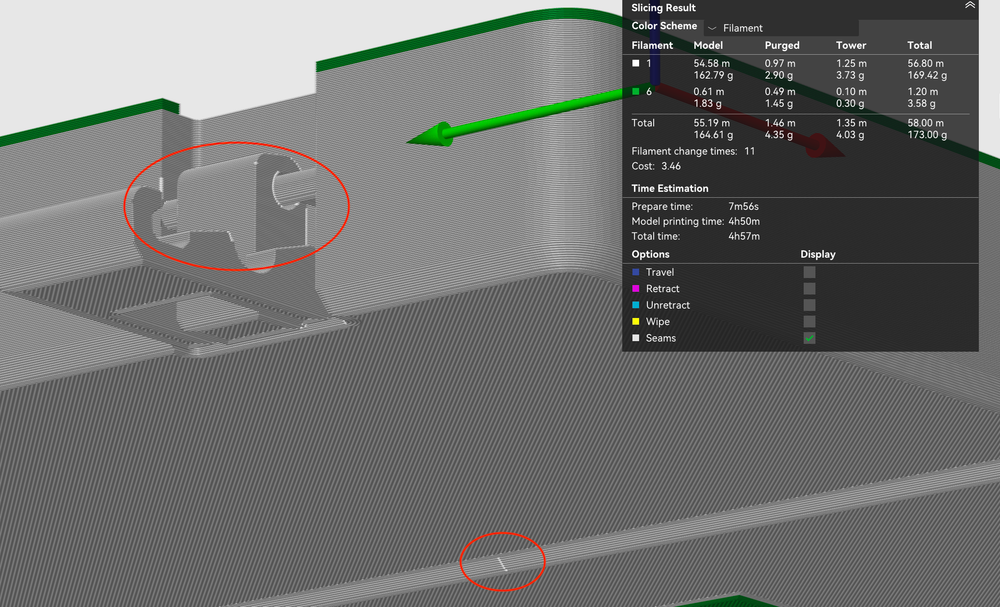
Scarf Joint: The Newest Fix
OrcaSlicer introduced a feature called Scarf Joint that tackles seams differently. Instead of hiding where the seam lands, it changes how the seam forms.
Standard seams create an abrupt start and stop. Scarf Joint uses tapered layer transitions, gradually ramping extrusion up at the start and down at the end. The result: seams that blend into the surface rather than standing out.
The 3D printing community on Reddit has called Scarf Joint a "holy grail" update. Users are posting before-and-after photos of cylindrical prints showing dramatic improvements on curved surfaces, where traditional seam hiding doesn't work well.
Speed and Pressure Settings Matter
Seams get worse when your printer deposits inconsistent amounts of plastic. This happens when nozzle pressure varies at start/stop points. Slowing down outer wall speeds helps.
A recommended outer wall speed of 30 mm/s reduces the pressure variance that causes "zits" and "blobs" at seam points. It's slower, but the finish is cleaner. For display pieces, the time tradeoff is usually worth it.
Model Design Can Help Too
If you design your own models, you can build seam-hiding features directly into the geometry. Adding a subtle ridge, groove, or chamfer gives the slicer a natural place to hide transitions.
This is why commercial 3D printed products often have panel lines or decorative edges. They're not just aesthetic choices. They're functional seam hiders.
The Realistic Expectation
Seams won't disappear. FDM printing has physical constraints that guarantee some kind of transition mark where layers begin and end. The goal is management, not elimination.
Preview before printing. Use seam painting for critical pieces. Try Scarf Joint in OrcaSlicer for curved objects. Slow down outer walls if finish matters. Design hiding spots into your models when possible.
With these tools, seams become a problem you solve once per model, not a defect you accept on every print.
Logicity's Take
Frequently Asked Questions
Can you completely remove seams from 3D prints?
No. Seams are inherent to FDM printing because each layer must start and stop somewhere. You can hide them, reduce their visibility, and position them strategically, but complete removal isn't possible with current technology.
What is Scarf Joint seam in 3D printing?
Scarf Joint is a feature in OrcaSlicer that gradually ramps extrusion up and down at layer transitions instead of making abrupt starts and stops. This creates a tapered seam that blends into the surface, reducing visibility by about 50%.
Does print speed affect seam visibility?
Yes. Slower outer wall speeds (around 30 mm/s) reduce nozzle pressure variance, which minimizes the "zits" and "blobs" that form at seam points. Faster speeds can make seams more pronounced.
What is seam painting in 3D printing slicers?
Seam painting is a manual tool in slicers like PrusaSlicer and Bambu Studio that lets you paint zones on your model where seams should or shouldn't appear. Green zones attract seams, red zones repel them.
Why do cylindrical 3D prints show seams more than square objects?
Square objects have corners where seams naturally blend in. Cylindrical objects have no corners, so the seam line runs up a smooth, curved surface where it's highly visible. This is why Scarf Joint technology was developed.
Need Help Implementing This?
Source: How-To Geek
Huma Shazia
Senior AI & Tech Writer
اقرأ أيضاً

رأي مغاير: كيف يؤثر اختراق الأمن الداخلي الأميركي على شركاتنا الخاصة؟
في ظل اختراق عقود الأمن الداخلي الأميركي مع شركات خاصة، نناقش تأثير هذا الاختراق على مستقبل الأمن السيبراني. نستعرض الإحصاءات الموثوقة ونناقش كيف يمكن للشركات الخاصة أن تتعامل مع هذا التهديد. استمتع بقراءة هذا التحليل العميق

الإنسان في زمن ما بعد الوجود البشري: نحو نظام للتعايش بين الإنسان والروبوت - Centre for Arab Unity Studies
في هذا المقال، سنناقش كيف يمكن للبشر والروبوتات التعايش في نظام متكامل. سنستعرض التحديات والحلول المحتملة التي تضعها شركات مثل جوجل وأمازون. كما سنلقي نظرة على التوقعات المستقبلية وفقًا لتقرير ماكنزي

إطلاق ناسا لمهمة مأهولة إلى القمر: خطوة تاريخية نحو استكشاف الفضاء
تعتبر المهمة الجديدة خطوة هامة نحو استكشاف الفضاء وتطوير التكنولوجيا. سوف تشمل المهمة إرسال رواد فضاء إلى سطح القمر لconducting تجارب علمية. ستسهم هذه المهمة في تطوير فهمنا للفضاء وتحسين التكنولوجيا المستخدمة في استكشاف الفضاء.