5 Ways to Fix 3D Printing Support Marks and Waste

Key Takeaways
- Reorienting your print or cutting it into parts can eliminate the need for supports entirely
- Tree supports can save up to 40% on material compared to standard grid supports
- Using a different filament for the support interface layer makes removal dramatically easier
Anyone who has spent time with a 3D printer knows the frustration. You design or download a model, slice it, wait for the print to finish, and then spend the next twenty minutes picking away at support structures. Sometimes they come off clean. Often they leave scars on your print. Occasionally they fuse so tightly that removing them destroys the object entirely.
Support structures exist for good reason. They provide scaffolding for overhangs and floating features that would otherwise droop or fail during printing. But the tradeoff is significant: wasted filament, tedious post-processing, and surface quality that never quite matches the unsupported areas of your print.
According to industry estimates, roughly 70% of failed hobbyist prints involve damage during support removal. The good news is that a few targeted adjustments can dramatically improve your results.
1. Avoid Supports Entirely Through Orientation
The best support is the one you never print. Before hitting slice, ask yourself: can I rotate this model to eliminate overhangs?
Many objects that seem to require supports actually print fine when positioned differently on the build plate. A 45-degree overhang that needs scaffolding becomes a self-supporting angle when you flip the model. The trick is thinking about how gravity affects each layer as it's deposited.
Consider layer lines too. Reorienting a print affects both strength and surface finish. A functional part might be weaker in one orientation even if it prints cleaner. For decorative objects, you have more flexibility.
2. Cut Your Model Into Multiple Parts
When reorientation won't work, splitting the model often will. Most slicing software includes a cut tool that lets you divide an object into sections that each print flat.
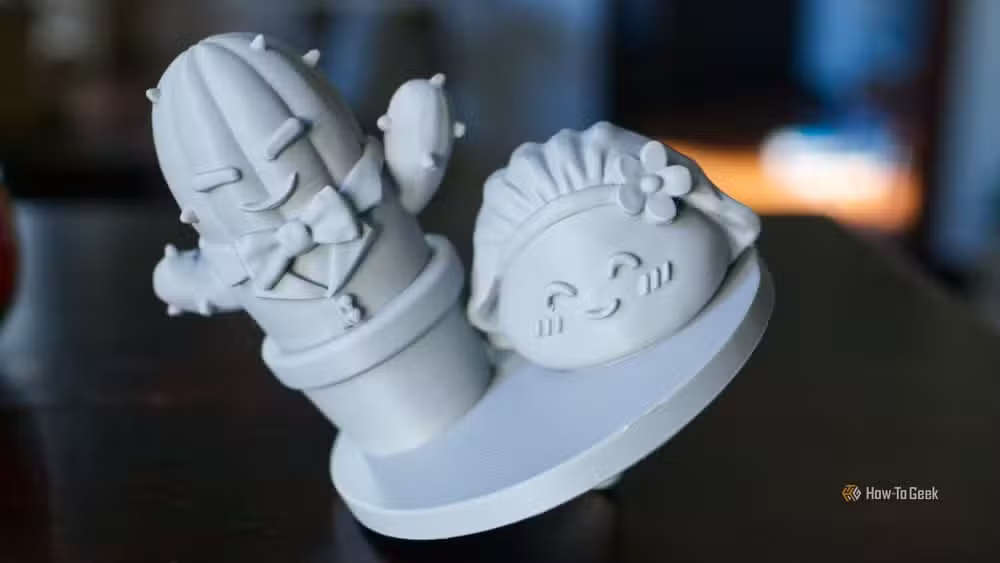
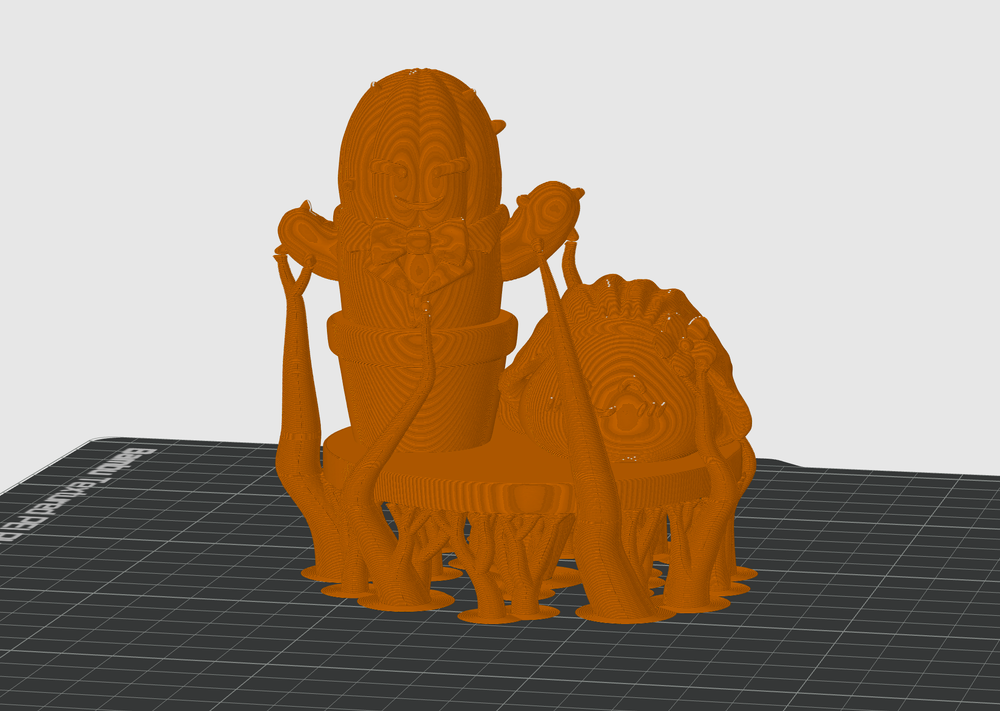
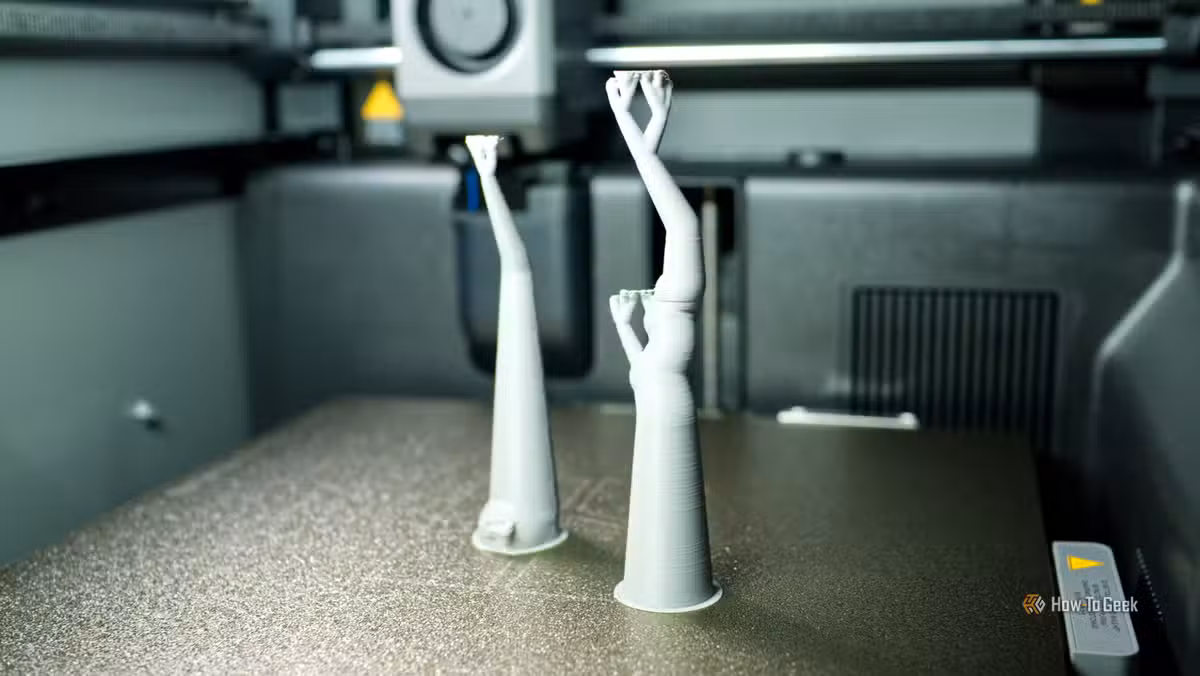
Tim Brookes at How-To Geek recently printed a cake topper that illustrates this perfectly. The design included a spike at the bottom meant to anchor it into frosting. That spike created a complicated support situation. Even after removing the supports cleanly, Brookes concluded that using Bambu Studio's cut tool to slice off the spike and print it separately would have produced a better result.
Yes, you'll need to glue pieces together afterward. But a clean glue seam often looks better than support scarring, and the assembly process is usually faster than picking away at stubborn scaffolding.
3. Switch to Tree Supports
If you're still using traditional grid supports, tree supports are worth trying. These organic-looking structures branch upward like, well, trees, touching the model only where necessary.
The material savings are substantial. Users report around 40% less filament consumption when switching from standard grid supports to tree or organic supports. The reduced contact area also means fewer marks on the finished print and easier removal.
Both Bambu Studio and OrcaSlicer offer tree support options. The 2026 consensus across Reddit's r/3Dprinting community has shifted firmly toward tree supports as the default recommendation for most prints.
4. Tune Your Support Interface Settings
The interface layer sits between your support structure and the actual print. It's the most critical surface in determining whether supports pop off cleanly or fuse permanently.
“The best support is the one you don't have to remove, but when you must, treat the interface as the most critical layer of your entire print.”
— Stefan Hermann, CNC Kitchen Founder
The default settings in Bambu Studio and OrcaSlicer work adequately for most users. But if you're having trouble with supports that stick too firmly, try adjusting the "Line width for supports" parameter under the Quality tab. A wider gap between support lines reduces contact area.
You can also increase the Z distance between the support top and the model bottom. Even a small increase makes removal easier, though too much gap risks sagging in the first overhanging layers.
5. Use a Different Filament for Support Interface
If you have a multi-material printer, this technique is considered the gold standard in the 3D printing community. The idea is simple: print your model in one material and the support interface layer in another that doesn't bond well to it.
The classic combination is PLA for the model and PETG for the support interface. These materials print at similar temperatures but don't adhere strongly to each other. Users frequently share pictures of supports popping off in one clean piece with this method.
Water-soluble support materials like PVA take this further. Print supports in PVA, drop the finished print in water, and the supports dissolve away completely. No picking, no scarring. The tradeoff is cost, since PVA filament runs significantly more expensive than standard materials.
Why This Still Matters
Support structures represent one of the last major friction points in making 3D printing feel like a mature consumer technology. The hardware has improved dramatically. Software has become more intuitive. But the post-processing step still requires manual intervention that can ruin otherwise successful prints.
“Support settings are the final frontier in making 3D printing feel less like a science experiment and more like a consumer appliance.”
— Industry Analyst, Additive Manufacturing Insights
The techniques above won't eliminate supports entirely. Complex geometries will always need scaffolding. But they can reduce the frequency, the waste, and the frustration that comes with this necessary compromise.
Logicity's Take
Frequently Asked Questions
What angle can 3D printers print without supports?
Most FDM printers handle overhangs up to 45 degrees without supports. Some machines with good cooling can push to 60 degrees. Test your specific printer with a calibration model to find its limits.
Do tree supports use less filament than normal supports?
Yes. Users report approximately 40% material savings when switching from standard grid supports to tree or organic supports, plus easier removal and fewer surface marks.
How do I remove 3D print supports without damaging the model?
Use flush cutters to snip large sections, then work slowly with needle-nose pliers for remaining bits. For stubborn supports, try heating the area briefly with a heat gun to soften the plastic before removal.
What is the best support interface material for easy removal?
For multi-material printers, PETG interface on PLA models is widely considered the gold standard. The materials don't bond well, so supports pop off cleanly. Water-soluble PVA works even better but costs more.
Should I use supports for every 3D print?
No. Many prints work fine without supports when oriented correctly. Your slicer will warn you about unsupported overhangs, but those warnings are often overly cautious. Experiment to find what your printer can handle.
Need Help Implementing This?
Source: How-To Geek
Manaal Khan
Tech & Innovation Writer
اقرأ أيضاً

رأي مغاير: كيف يؤثر اختراق الأمن الداخلي الأميركي على شركاتنا الخاصة؟
في ظل اختراق عقود الأمن الداخلي الأميركي مع شركات خاصة، نناقش تأثير هذا الاختراق على مستقبل الأمن السيبراني. نستعرض الإحصاءات الموثوقة ونناقش كيف يمكن للشركات الخاصة أن تتعامل مع هذا التهديد. استمتع بقراءة هذا التحليل العميق

الإنسان في زمن ما بعد الوجود البشري: نحو نظام للتعايش بين الإنسان والروبوت - Centre for Arab Unity Studies
في هذا المقال، سنناقش كيف يمكن للبشر والروبوتات التعايش في نظام متكامل. سنستعرض التحديات والحلول المحتملة التي تضعها شركات مثل جوجل وأمازون. كما سنلقي نظرة على التوقعات المستقبلية وفقًا لتقرير ماكنزي

إطلاق ناسا لمهمة مأهولة إلى القمر: خطوة تاريخية نحو استكشاف الفضاء
تعتبر المهمة الجديدة خطوة هامة نحو استكشاف الفضاء وتطوير التكنولوجيا. سوف تشمل المهمة إرسال رواد فضاء إلى سطح القمر لconducting تجارب علمية. ستسهم هذه المهمة في تطوير فهمنا للفضاء وتحسين التكنولوجيا المستخدمة في استكشاف الفضاء.